 by
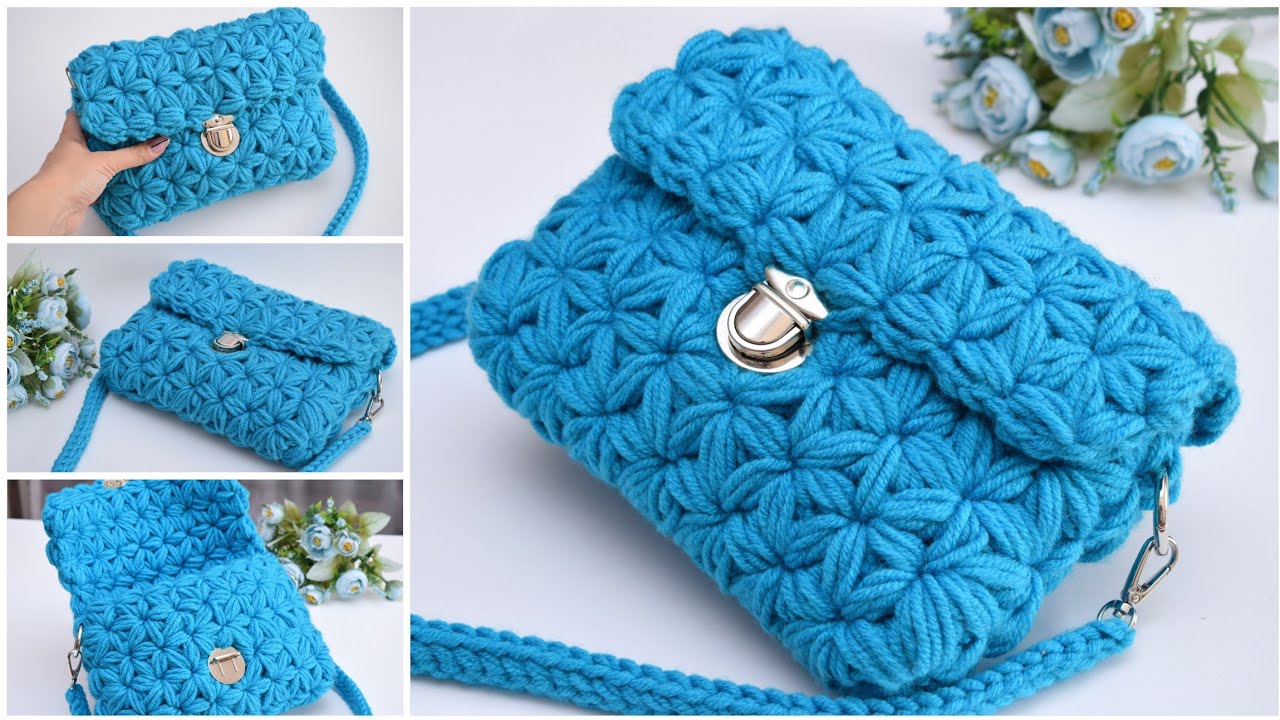
by Sure! Here’s a detailed, beginner-friendly guide on how to make a “Winter Handbag” with a star pattern — perfect for those who are new to crochet but want to create something stylish and cozy.
👜 How to Make a Winter Handbag with Star Pattern (Beginner Friendly Crochet)
🌟 Overview
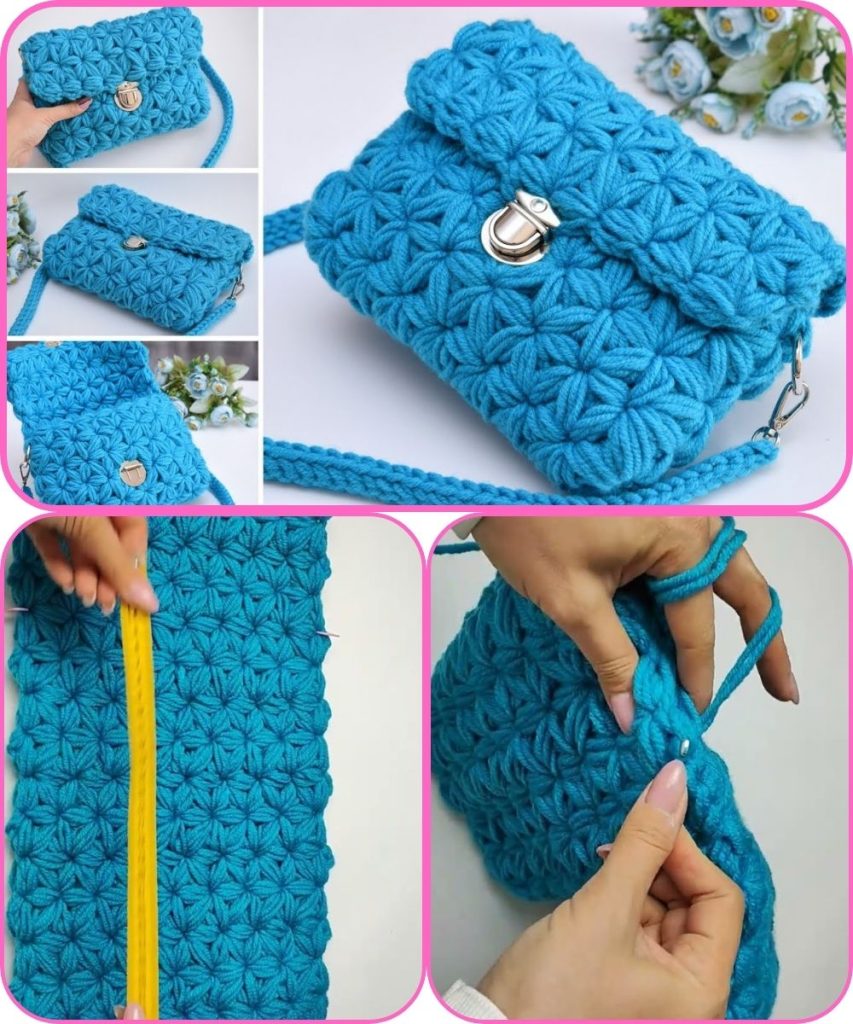
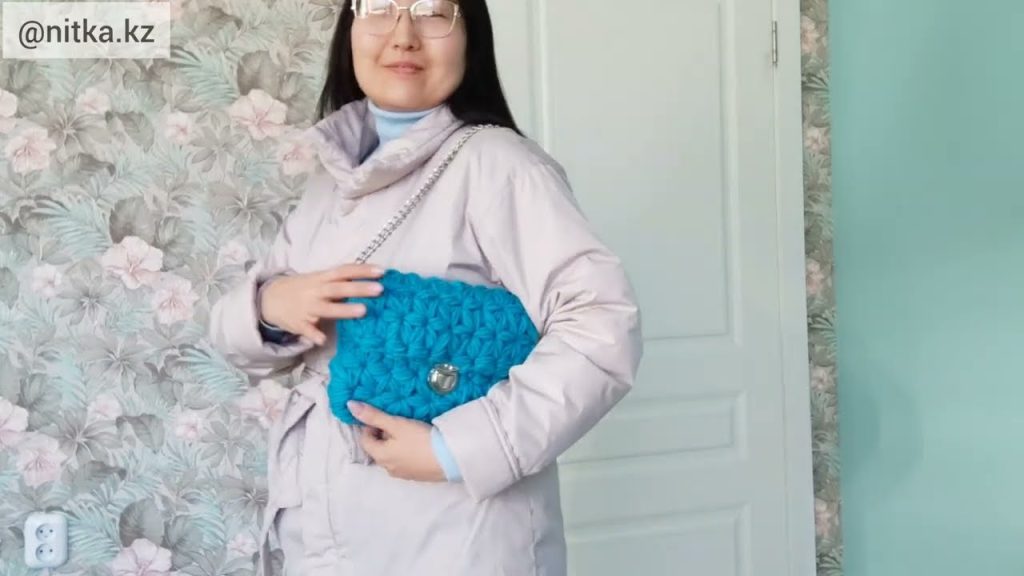
This Winter Handbag with a star pattern is a charming, textured accessory that’s perfect for cold weather. The design uses a star stitch (also called the Marguerite stitch), which creates a beautiful, snowflake-like texture — ideal for a winter-themed bag. The project is easy to crochet, even for beginners, and can be finished in a weekend.
🧶 Materials Needed
| Item | Recommended |
|---|---|
| Yarn | Medium (Worsted) weight acrylic or wool blend yarn — 2 colors if you want contrast (e.g., cream + grey) |
| Hook | 5.0 mm (H/8) crochet hook |
| Lining (optional) | Cotton or felt fabric for a clean inside finish |
| Bag handles | Wooden, leather, or crochet-made handles |
| Scissors | For cutting yarn |
| Yarn needle | For weaving in ends |
| Stitch markers | Optional, for marking rounds |
✨ Crochet Stitches Used
- Chain (ch)
- Single Crochet (sc)
- Half Double Crochet (hdc)
- Star Stitch (special stitch) — explained below
- Slip Stitch (sl st)
🪄 How to Crochet the Star Stitch
The star stitch looks intricate but is easy once you get the hang of it. Here’s how:
- Start with an even number of chains.
- Insert your hook into the 2nd chain from the hook and pull up a loop.
- Insert into the next 4 chains, pulling up one loop each time (you’ll have 6 loops on your hook).
- Yarn over and pull through all 6 loops.
- Chain 1 to close the star — this forms the “eye” of the star.
- For the next star:
- Insert the hook into the “eye” of the previous star,
- Insert into the last loop of the previous star’s leg,
- Insert into the next 3 chains,
- Yarn over, pull through all loops, and chain 1.
- Repeat to end of the row.
🧵 Step-by-Step Instructions
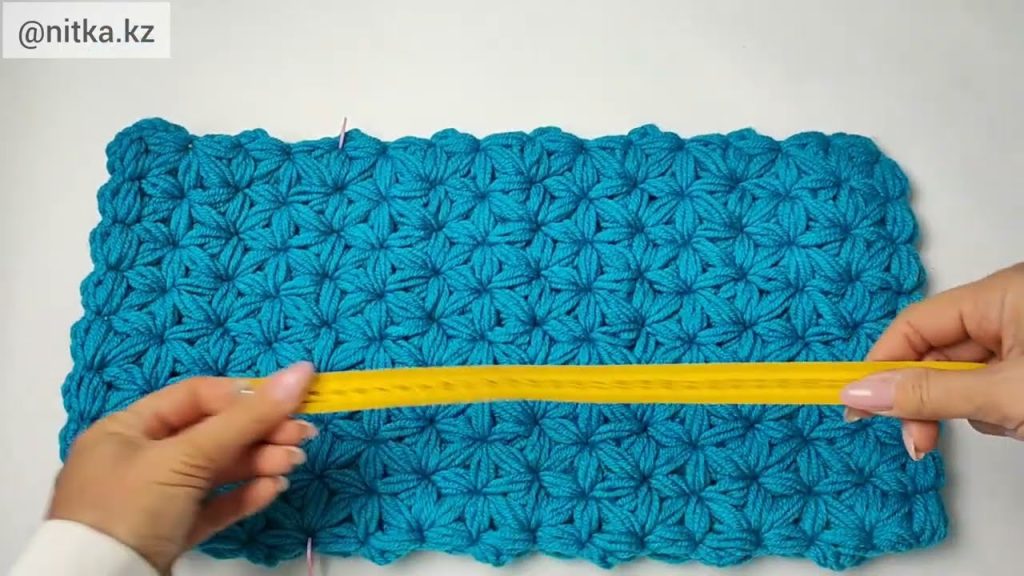
1. Base of the Bag
- Chain 36 (or adjust to desired width).
- Row 1: Work 1 hdc in the 2nd chain from the hook and each across.
- Row 2: Chain 3 (counts as first stitch). Work the star stitch pattern across.
- Continue rows of star stitch until your piece measures about 10 inches (25 cm) tall.
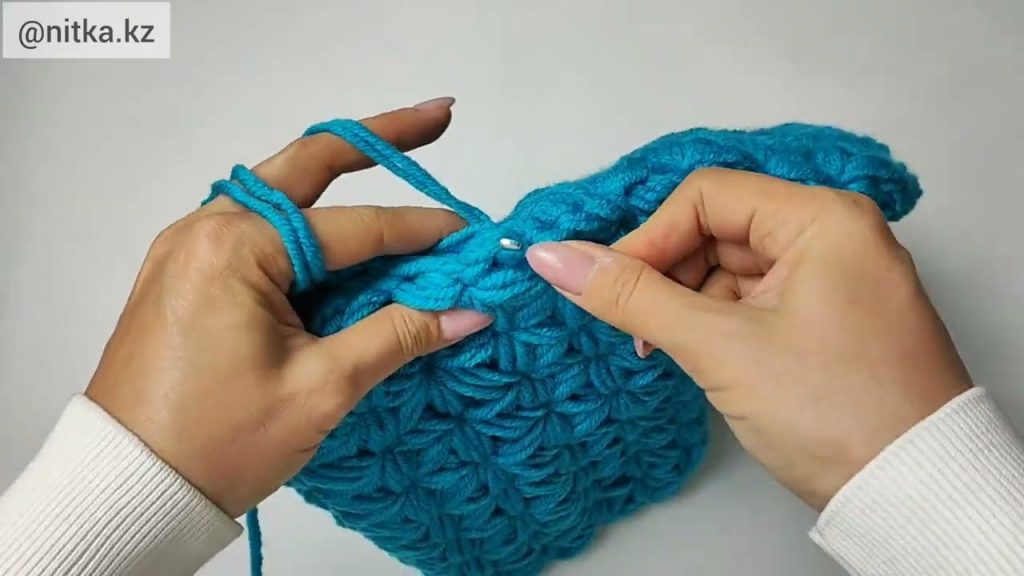
2. Forming the Bag
- Fold your rectangle in half (widthwise).
- Use single crochet or slip stitch to join the sides together.
- Leave the top open.
3. Top Border
- Round 1: Attach yarn at the top edge and make 1 row of sc all around the opening.
- Round 2: Add an optional round of hdc or decorative edging (like picot stitch).
4. Handles
You can attach:
- Ready-made handles using yarn or small stitches through the holes, or
- Crochet handles:
- Chain 50 (for shoulder length).
- Work 2 rows of hdc.
- Attach evenly on both sides.
5. Optional Lining
- Cut a piece of lining fabric matching your bag size.
- Sew it inside the bag using hand stitches or fabric glue.
❄️ Finishing Touches
- Add tassels, buttons, or a pom-pom for a wintery touch.
- You can also crochet a snowflake applique and sew it onto the bag front.
💡 Tips for Beginners
- Keep your tension even for neat stars.
- Use light-colored yarn at first — easier to see stitches.
- Watch a short video tutorial on the star stitch if you’re a visual learner.
- Practice a small swatch before starting the full bag.
🧤 Design Ideas
- Color combo: White + navy (snowy night look)
- Accent: Add a faux fur trim for a cozy, wintery vibe.
- Size variations: Make a mini version for a clutch or a larger one for a tote.
Would you like me to include a written pattern with row-by-row stitch counts and measurements, or a diagram/chart to follow visually? I can create either (or both) for you.
Watch tutorial: