 by
by Here’s a clear, beginner-friendly, detailed guide you can use for a project, blog post, or class assignment.
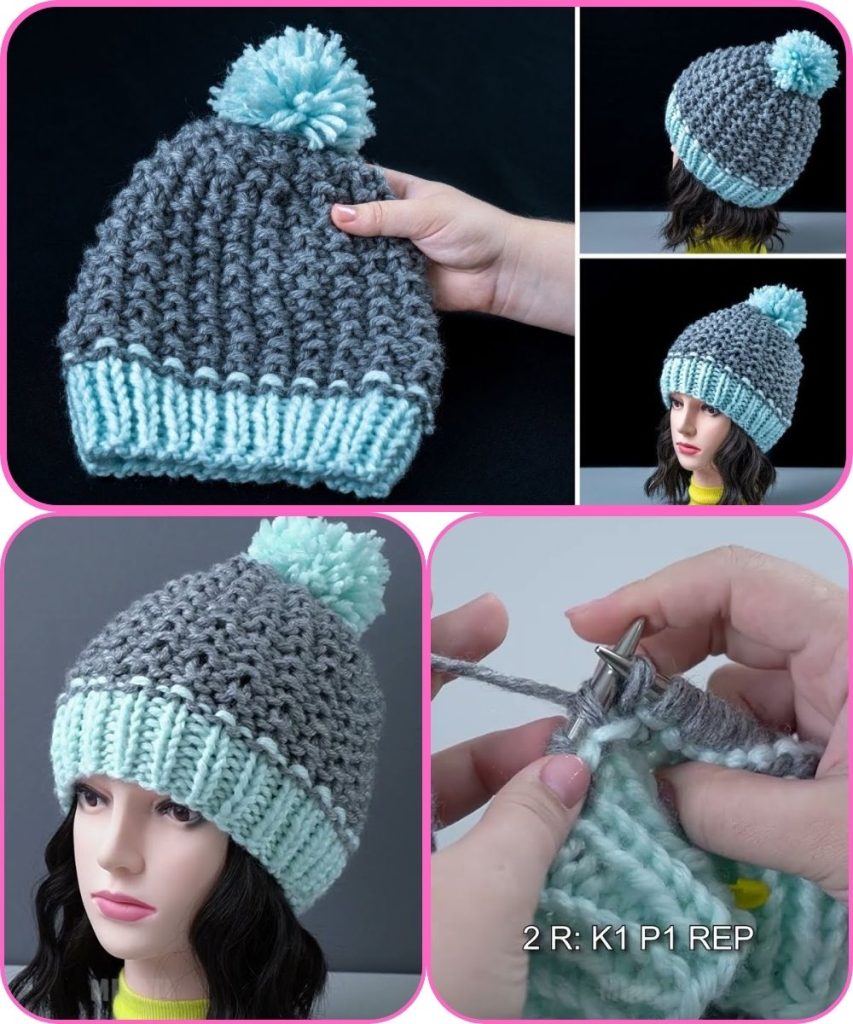
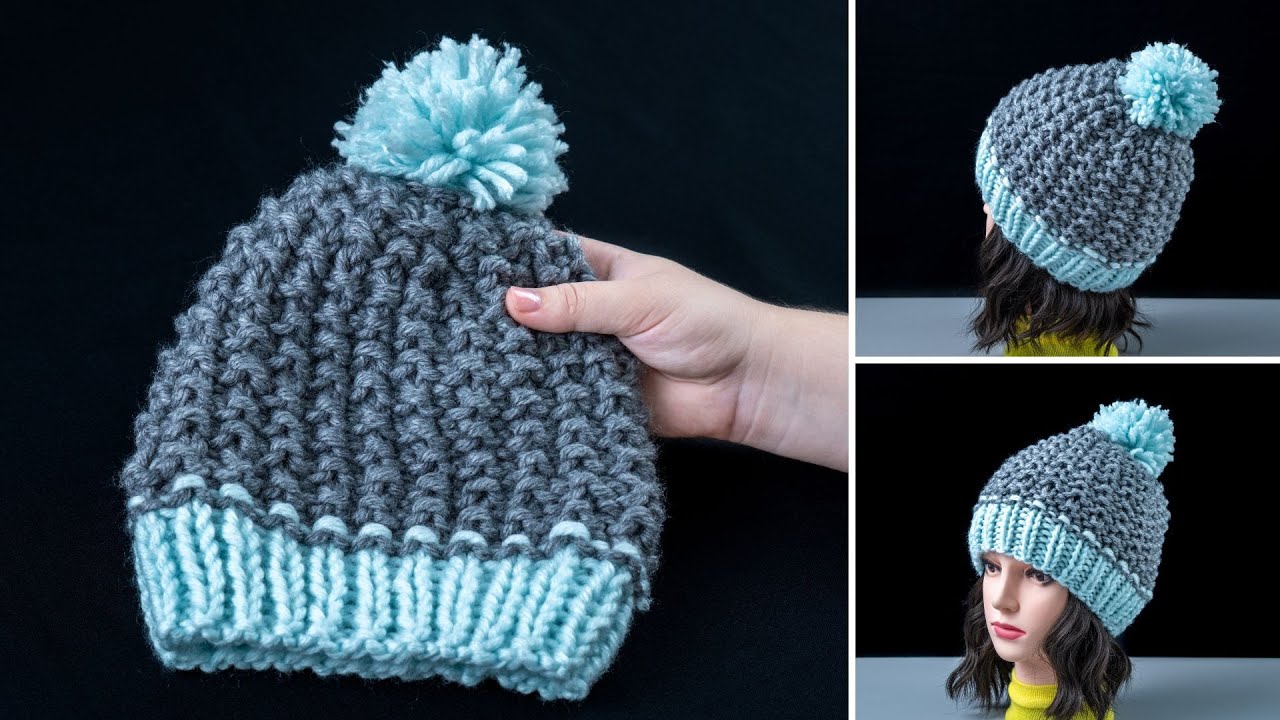
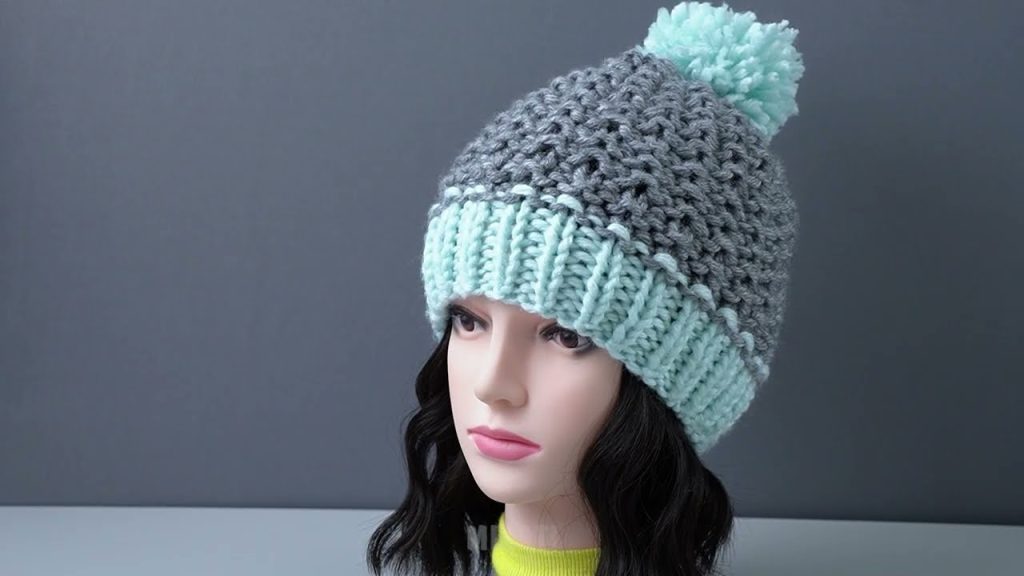
How to Make a Quick Knitted Hat with a Simple Stitch Pattern
Knitting a hat is one of the fastest and most satisfying knitting projects, especially for beginners. With a simple stitch pattern and basic tools, you can create a cozy hat in just a few hours. This guide explains the materials needed and the step-by-step process to make a quick knitted hat that looks neat and stylish.
Materials You Will Need
To make a simple knitted hat, gather the following supplies:
- Yarn: Medium-weight (worsted weight) yarn works best for beginners because it is easy to handle and knits up quickly.
- Knitting needles: Circular needles (about 16 inches long) or double-pointed needles in size 8–10 (5–6 mm).
- Scissors
- Yarn needle: For weaving in ends
- Stitch marker: Optional, but helpful for marking rounds
Choosing a Simple Stitch Pattern
For a quick project, use a basic stitch that is easy to remember:
- Garter stitch: Knit every stitch. This creates a stretchy, textured fabric.
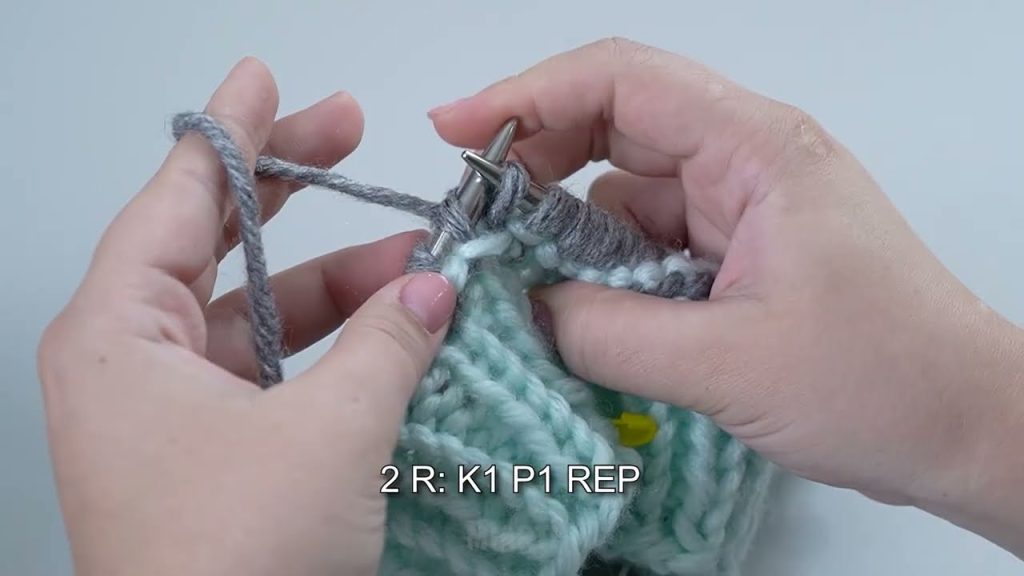
- Rib stitch (K1, P1): Knit one stitch, purl one stitch. This stitch is great for hats because it stretches comfortably around the head.

Step-by-Step Instructions
1. Cast On
Start by casting on 64–80 stitches, depending on the size of the hat and the thickness of your yarn. Make sure the stitches are not twisted on the needle. If using circular needles, join the stitches into a round and place a stitch marker at the beginning.
2. Knit the Brim
Knit the brim of the hat using your chosen stitch pattern:
- For rib stitch: Knit 1, purl 1 all the way around.
- Continue for 1.5 to 2 inches to create a snug and stretchy brim.
3. Knit the Body of the Hat
After the brim, continue knitting using the same stitch or switch to knit stitches only if you want a smoother look.
- Knit in rounds until the hat measures about 7–8 inches from the cast-on edge.
- This part goes quickly and forms the main shape of the hat.
4. Decrease for the Top
To shape the top of the hat, begin decreasing stitches:
- Knit 6 stitches, then knit 2 together.
- Repeat this pattern around the hat.
- On the next rounds, knit fewer stitches between decreases.
- Continue until only 8–10 stitches remain.
5. Finish the Hat
Cut the yarn, leaving a short tail. Thread it through the remaining stitches using a yarn needle, pull tight, and secure. Weave in all loose ends neatly inside the hat.
Final Touches
You can personalize your hat by:
- Adding a pom-pom
- Using striped yarn or color changes
- Folding the brim for extra warmth
Conclusion
Making a quick knitted hat with a simple stitch pattern is a great way to practice basic knitting skills. It’s an easy project that builds confidence and results in a useful, handmade item. With just a little time and creativity, you can make a warm hat that’s perfect for yourself or as a gift.
If you’d like, I can also simplify this for younger beginners, turn it into a school project format, or add pictures/diagrams descriptions. 😊🧶
Watch tutorial: