 by
by Here’s a clear, beginner-friendly guide you can use as an article or project explanation.
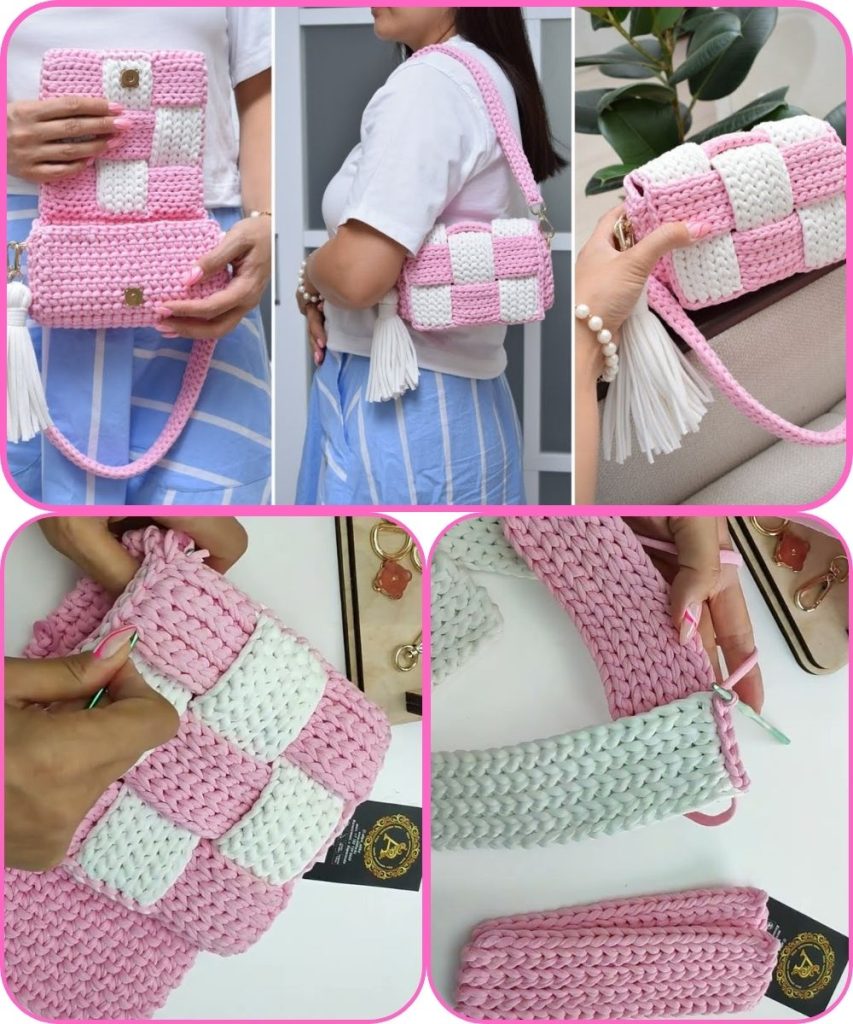
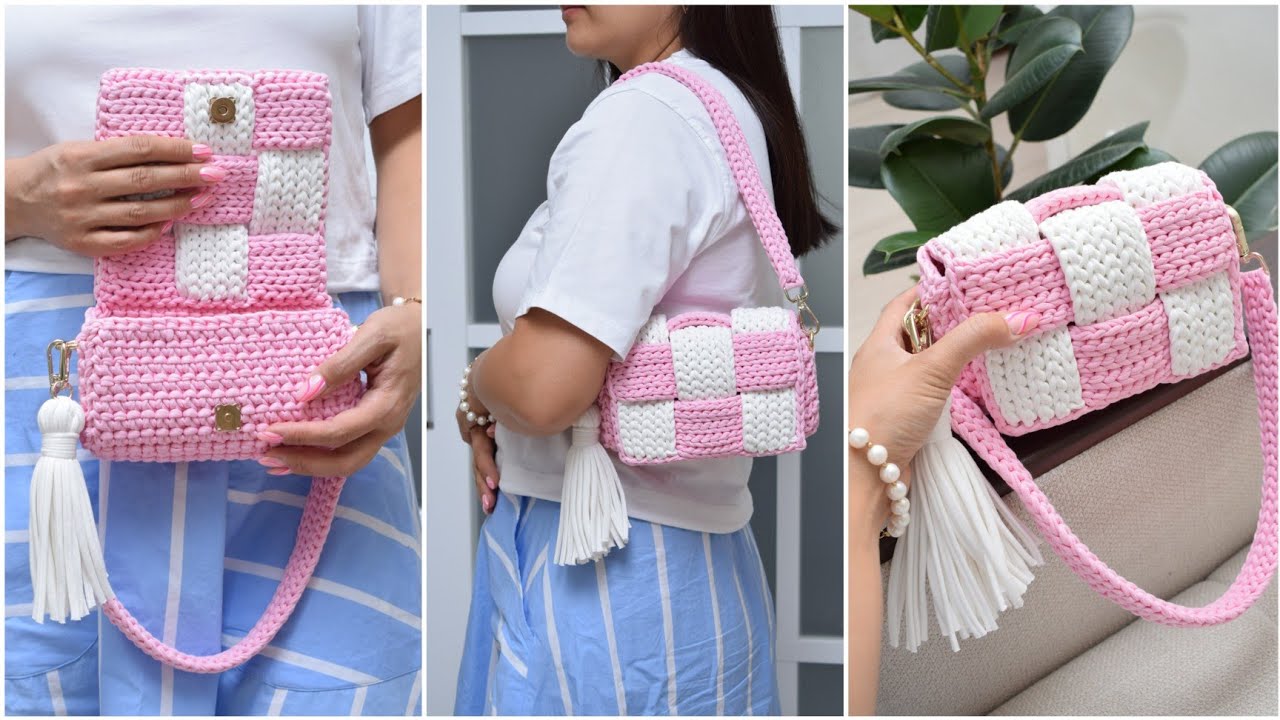
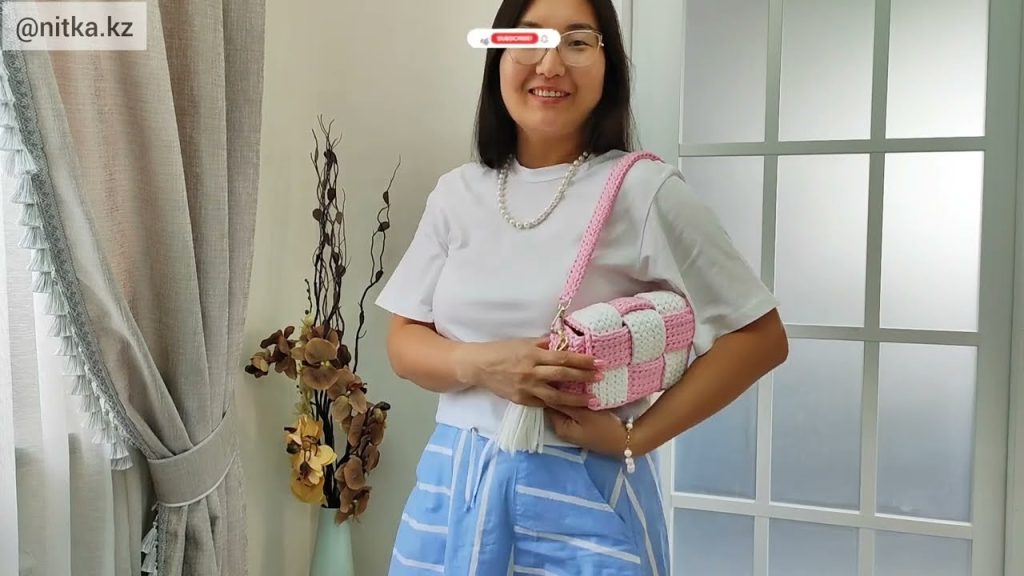
How to Make Your Favorite Crochet Handbag (Beginner Guide)
Crocheting a handbag is a fun and practical project, especially for beginners. You don’t need advanced skills, and you can customize the bag with your favorite colors and size. This guide explains the materials, basic stitches, and simple steps to help you create your own crochet handbag.
1. Materials You Will Need
Before you start, gather these basic supplies:
- Yarn: Medium-weight (worsted) yarn is best for beginners. Cotton yarn works well for handbags because it is strong and keeps its shape.
- Crochet Hook: Usually size 4–5 mm (check the yarn label for recommendations).
- Scissors: For cutting yarn.
- Yarn Needle: Used for sewing pieces together and weaving in ends.
- Stitch Marker (optional): Helps mark rounds or important stitches.
- Bag Accessories (optional): Buttons, zipper, lining fabric, or straps.
2. Basic Crochet Stitches to Know
If you are a beginner, you only need a few simple stitches:
- Slip Knot – To start your project
- Chain Stitch (ch) – The foundation of most crochet projects
- Single Crochet (sc) – Strong and great for handbags
- Slip Stitch (sl st) – Used to join rounds or finish edges
Practice these stitches before starting your handbag.
3. Making the Base of the Handbag
The base gives shape and strength to the bag.
- Make a slip knot, then chain the length you want for the bag’s bottom.
- Single crochet across the chain.
- Crochet around both sides of the chain to form an oval base.
- Continue crocheting in rounds until the base reaches your desired size.
Tip: Keep your stitches tight so the bag is sturdy.
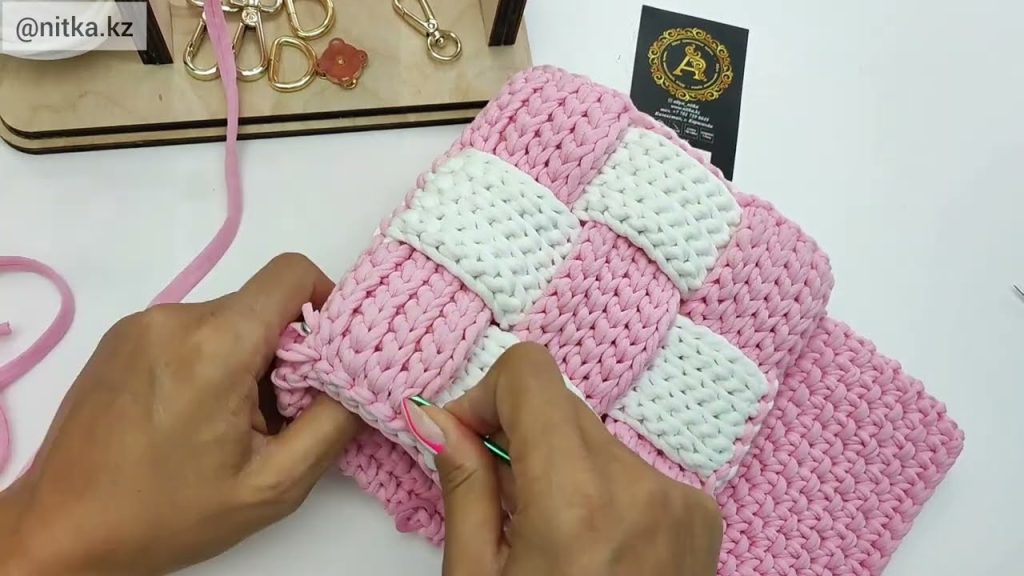
4. Crocheting the Body of the Bag
Once the base is ready, you can build the sides.
- Crochet single crochet stitches evenly around the base.
- Continue working in rounds without increasing stitches.
- Crochet upward until the bag reaches the height you like.
You can change colors or add simple patterns to make the bag more creative.
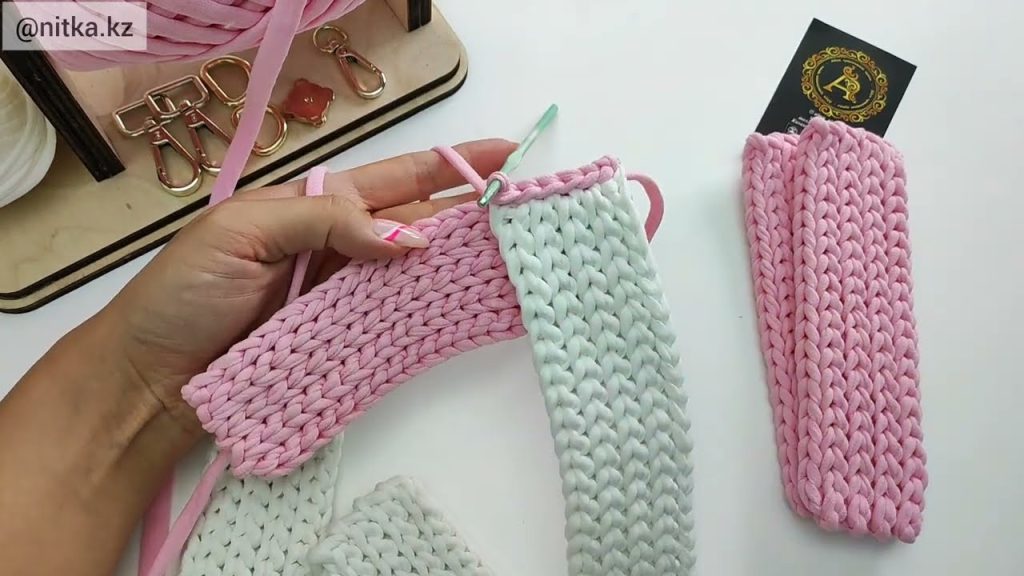
5. Making the Handle or Strap
There are two easy options:
- Crocheted Handle:
Chain the length you want, then single crochet back and forth until it feels strong enough. - Attached Handle:
Crochet directly onto the bag by chaining and connecting both sides.
Make sure the handle is thick and tight so it can hold weight.
6. Finishing Touches
To complete your handbag:
- Cut the yarn and fasten off securely.
- Use a yarn needle to weave in loose ends.
- Add decorations like buttons, tassels, or flowers.
- Optional: Sew fabric lining inside for extra durability.
7. Tips for Beginners
- Start with simple designs.
- Count stitches to keep the shape even.
- Use light-colored yarn so you can see stitches clearly.
- Don’t worry about mistakes—practice improves your skills.
Conclusion
Making a crochet handbag is a great beginner project that builds confidence and creativity. With basic stitches, simple tools, and patience, you can create a beautiful and useful bag. Once you finish your first handbag, you can experiment with new colors, patterns, and styles.
If you want, I can also:
- Simplify this into school project notes
- Create a step-by-step pattern
- Help you choose yarn and hook sizes
- Write it in short paragraph form
Just tell me 😊
Watch tutorial: