 by
by Absolutely! Let’s make this step-by-step guide to knitting a snood scarf simple and beginner-friendly. A snood is basically a circular scarf that you pull over your head, so it’s cozy and stylish. I’ll explain it clearly so you can follow even if you’re a total beginner.

Materials You’ll Need:
- Yarn: Choose chunky or super chunky yarn for beginners—it’s easier to handle. About 300–400 grams should be enough.
- Knitting needles: Size 8–12 mm (US size 11–17), depending on your yarn thickness. Chunky yarn usually needs bigger needles.
- Scissors
- Tapestry needle (for sewing the ends together if needed)
Step 1: Cast On
- Decide how wide you want your snood to be. A good beginner width is about 20–25 cm (8–10 inches).
- Cast on enough stitches to reach that width. With chunky yarn and big needles, 30–40 stitches should work.
- Tip: Don’t make it too tight; it should stretch comfortably over your head.
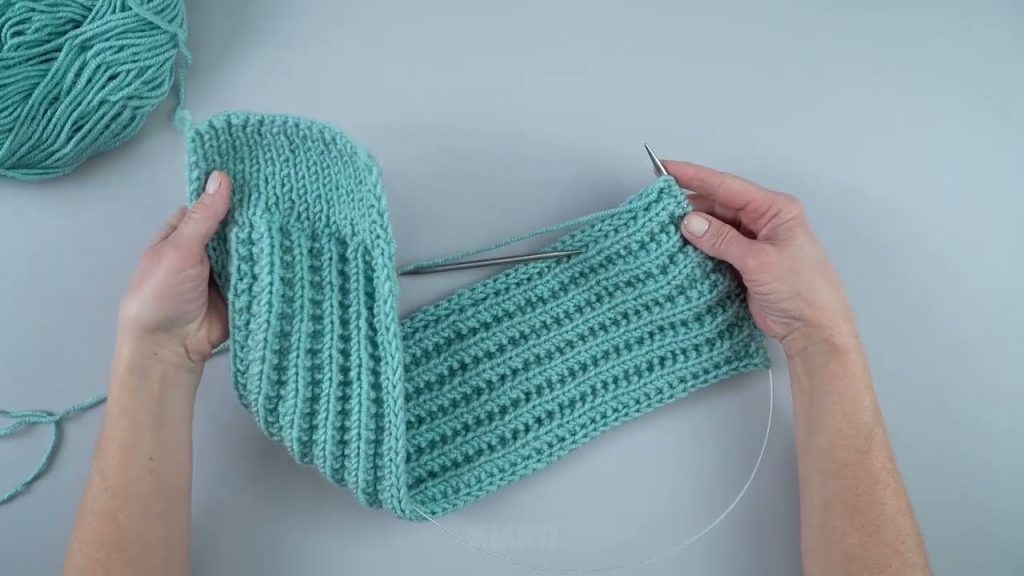
Step 2: Choose a Simple Stitch
For beginners, the easiest and nicest-looking options are:
- Garter Stitch:
- Knit every row.
- Creates a stretchy, squishy fabric.
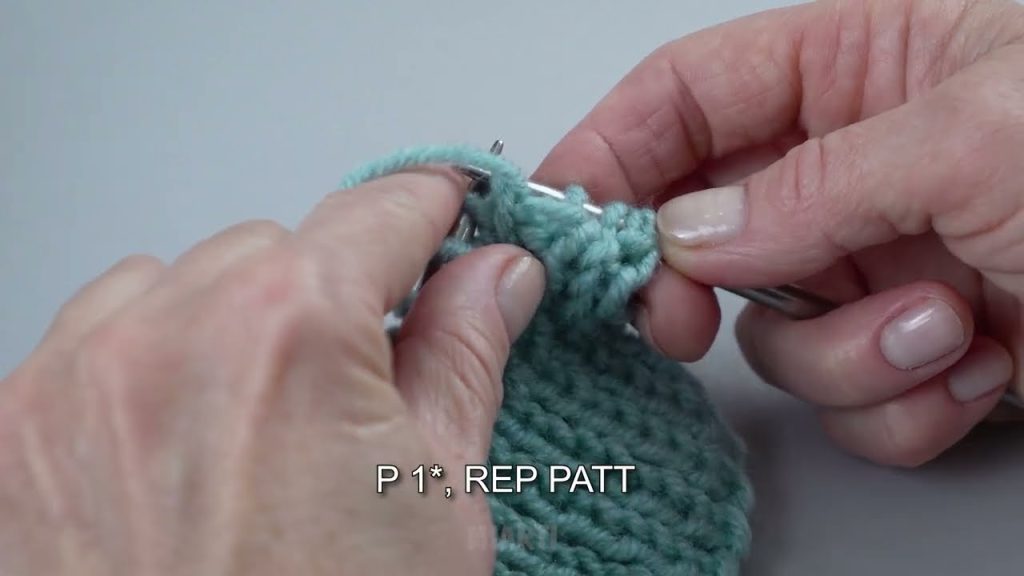
- Rib Stitch (optional for style):
- K1, P1 (knit 1, purl 1) across the row.
- Repeat every row.
- Makes the snood stretchy and snug.
Step 3: Knit the Length
- Keep knitting in your chosen stitch until the scarf is long enough to wrap around your neck comfortably, usually about 50–60 cm (20–24 inches) for a single loop snood.
- If you want a double loop snood, knit longer—about 120 cm (48 inches).
Step 4: Bind Off
- Once you reach the desired length, bind off your stitches loosely so the edge isn’t too tight.
- Leave a long tail of yarn (about 30 cm) to sew the ends together.
Step 5: Join the Ends
- Turn the scarf into a circle by sewing the cast-on edge and the bind-off edge together using the tapestry needle.
- Make sure the seam is neat and stretchy.
Step 6: Finishing Touches
- Weave in any loose ends using the tapestry needle.
- Stretch the snood gently to even out the stitches.
Tips for Beginners
- Chunky yarn = faster project. You can finish a snood in a few hours.
- Don’t pull stitches too tight—you want it comfy over your head.
- Use stitch markers if you want to keep track of rows.
- Practice your stitch on a small swatch before starting the full snood.
If you want, I can draw a super simple diagram showing exactly how to cast on, knit, and join the snood, so it’s easier to visualize for a beginner.
Watch tutorial: