by
by Here is a detailed and original write-up you can use for a project description, blog, or craft assignment:
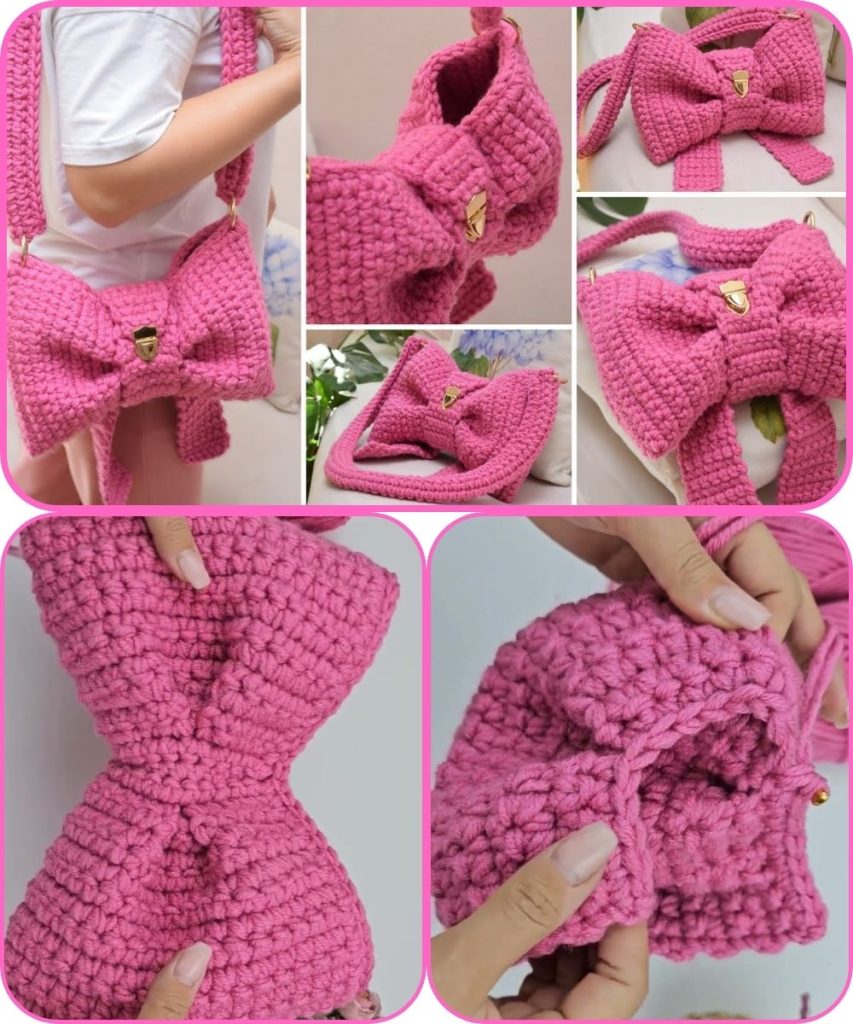
How to Make Crocheting a Bow Handbag: A Beautiful, Original, and Roomy Clutch Bag for Girls
Crocheting a bow handbag is a creative and enjoyable project that combines style, practicality, and handmade charm. This beautiful clutch bag is perfect for girls who love cute accessories while still needing enough space to carry daily essentials. With the right yarn, stitch pattern, and finishing touches, you can create an original and roomy crochet clutch that stands out.
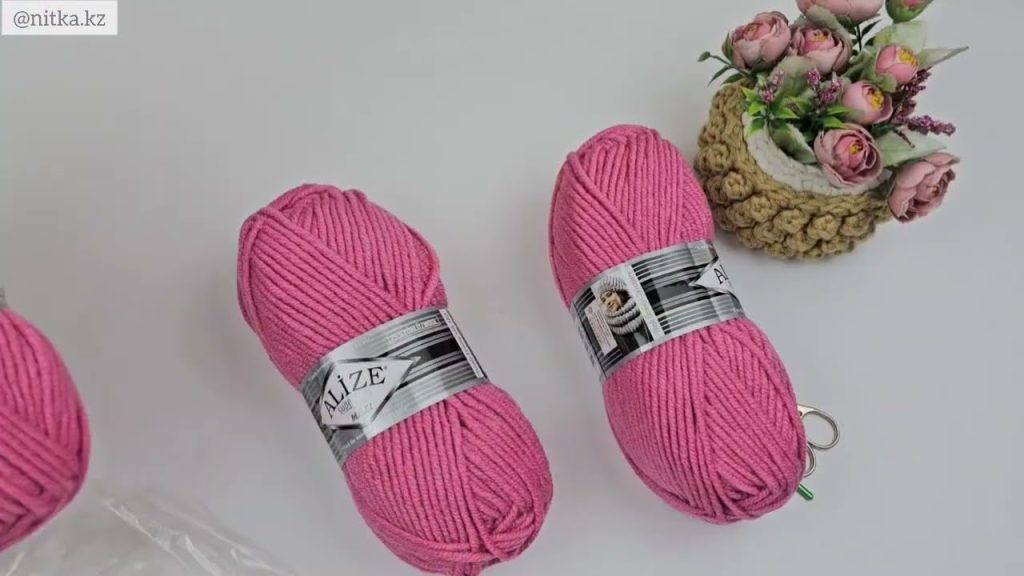
Materials Needed
To begin, gather the following materials:
- Medium-weight yarn (cotton or acrylic works best for structure)
- Crochet hook (size recommended for your yarn, usually 4–5 mm)
- Yarn needle
- Scissors
- Stitch markers (optional)
- Fabric lining (optional but recommended)
- Magnetic button or zipper (optional)
- Decorative bow (crocheted or pre-made)
Step 1: Choosing the Right Design and Color
Select soft yet durable yarn in colors that appeal to girls, such as pastel shades, bright tones, or classic neutrals. Solid colors highlight the bow design beautifully, while two-tone combinations can add a playful touch. Choosing a slightly stiff yarn helps the clutch keep its shape and look neat.
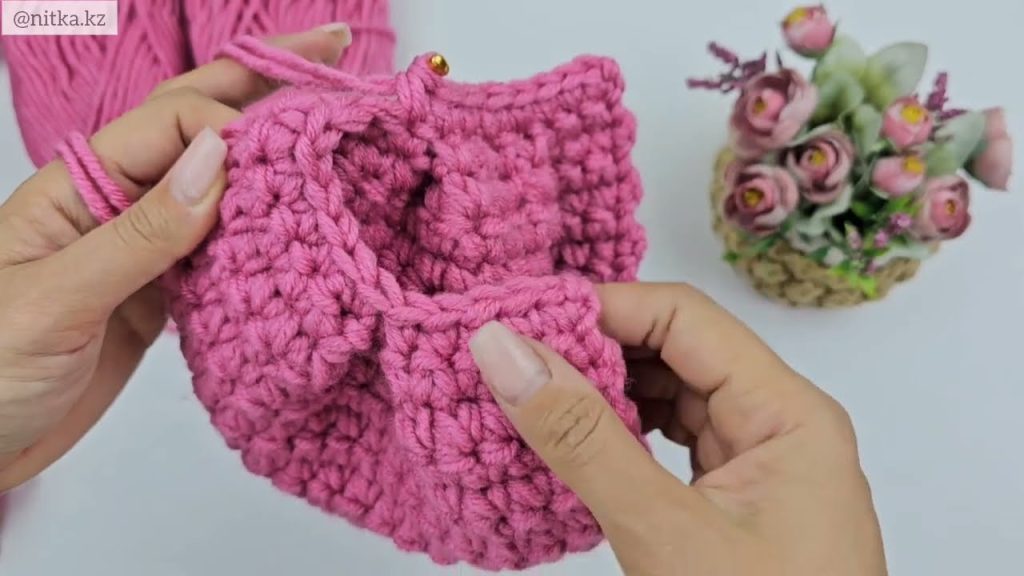
Step 2: Crocheting the Base of the Bag
Start by crocheting a rectangular or oval base using tight stitches such as single crochet or half-double crochet. A wide base ensures the clutch is roomy enough to store items like a phone, wallet, keys, and small accessories. Work evenly and count stitches carefully to keep the shape balanced.
Step 3: Building the Body of the Clutch
Once the base is complete, continue crocheting upward without increasing stitches. This creates the sides of the clutch. You can use textured stitches like:
- Half double crochet for a smooth look
- Moss stitch for a modern texture
- Shell stitch for a decorative, feminine feel
Crochet until the bag reaches your desired height, making sure it remains flexible but firm.
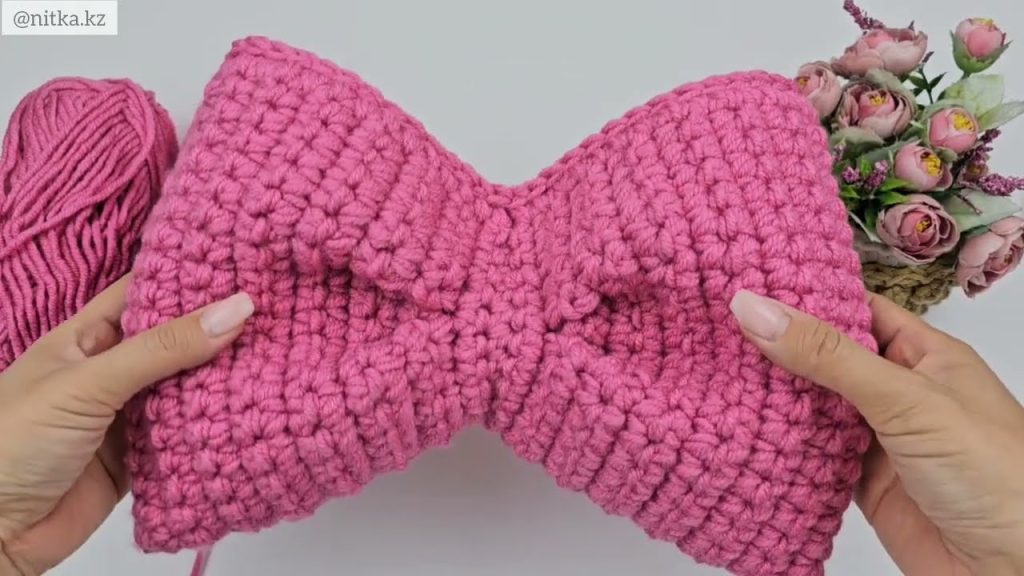
Step 4: Making the Bow
The bow is the highlight of the handbag. To crochet the bow:
- Create a small rectangle using tight stitches
- Fold it at the center and secure with yarn to form the bow shape
- Crochet a small strip to wrap around the center for a polished look
Attach the bow firmly to the front of the clutch to make it eye-catching and unique.
Step 5: Adding Lining and Closure
For a professional finish, sew a fabric lining inside the bag. This adds strength and prevents stretching. Attach a magnetic button or zipper to keep belongings secure while maintaining the clutch’s elegant appearance.
Step 6: Final Touches
Weave in all loose ends neatly. You can add small decorative elements like buttons, beads, or a chain strap if desired. Make sure all attachments are secure and comfortable to use.
Why This Crochet Bow Handbag Is Special
- Beautiful: The bow design adds charm and elegance.
- Original: Handmade details make each bag unique.
- Roomy: Designed to fit everyday essentials without being bulky.
- Perfect for Girls: Stylish, lightweight, and easy to carry.
Conclusion
Crocheting a bow handbag is a rewarding project that blends creativity with functionality. With careful stitching and thoughtful design, you can create a beautiful, original, and roomy clutch bag that girls will love to use or gift. This handmade accessory not only enhances personal style but also showcases the beauty of crochet craftsmanship.
If you want, I can also:
- Simplify this for a school assignment
- Turn it into step-by-step crochet instructions
- Rewrite it for a blog, Etsy listing, or YouTube description
Watch tutorial: