 by
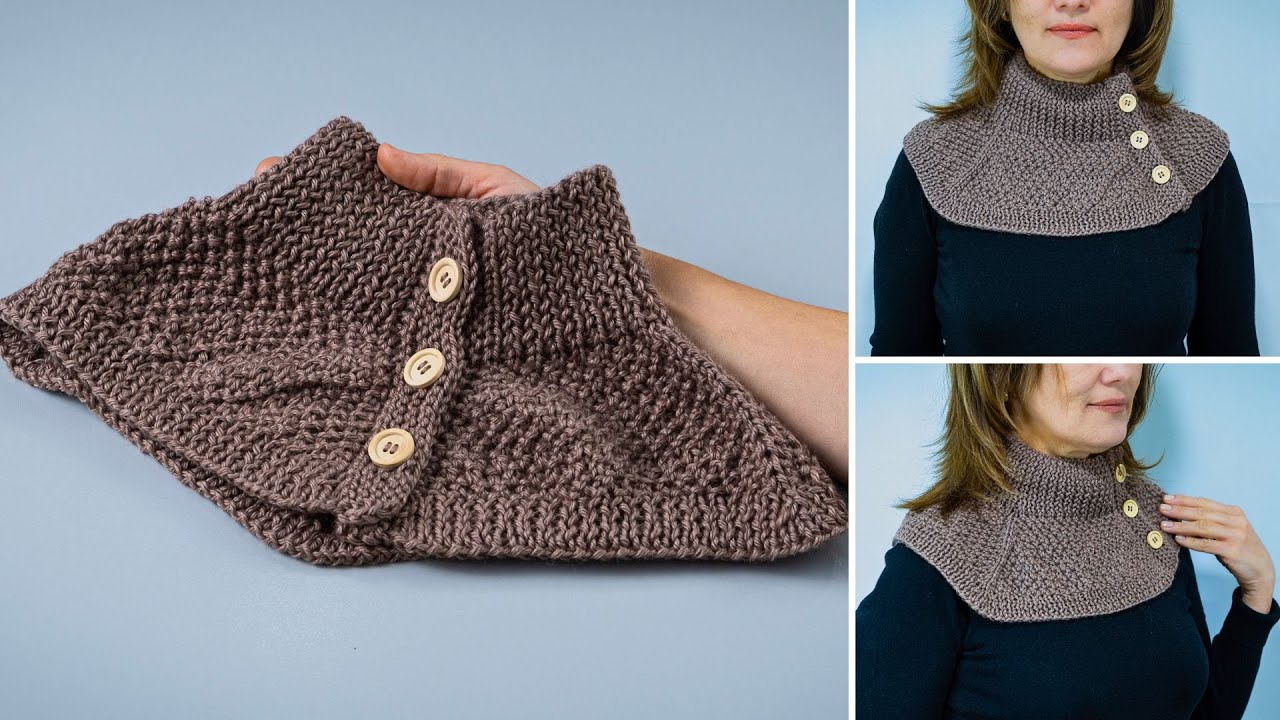
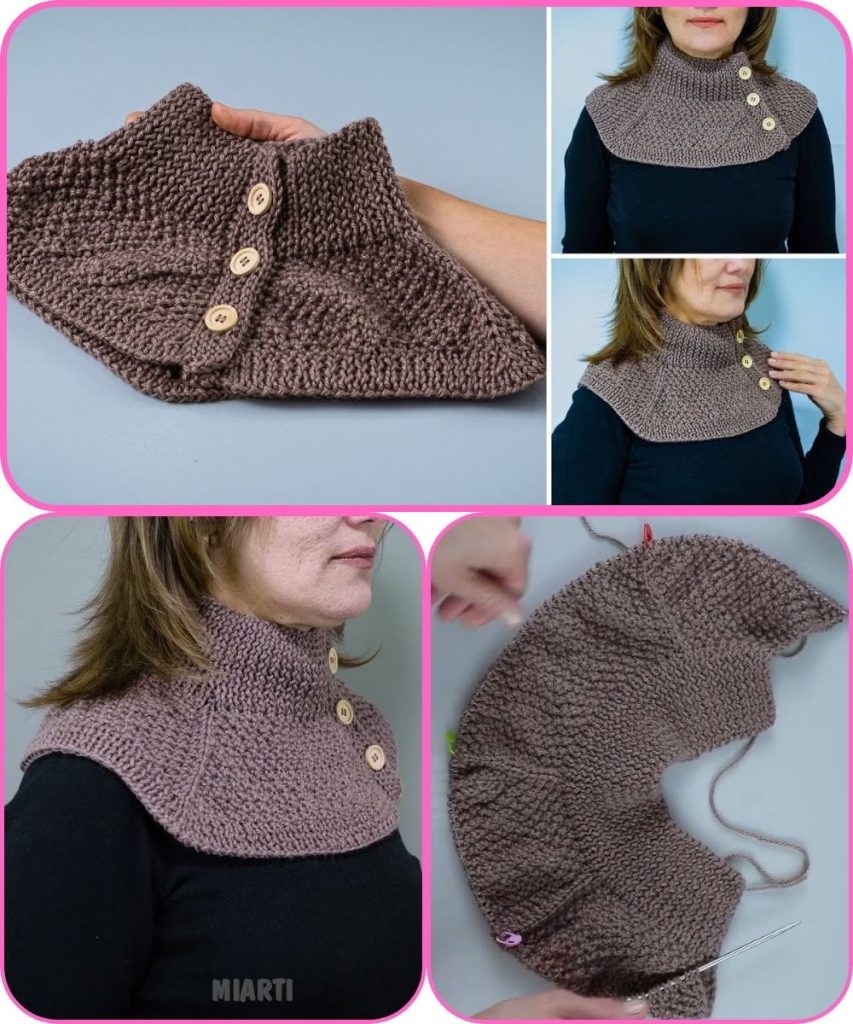
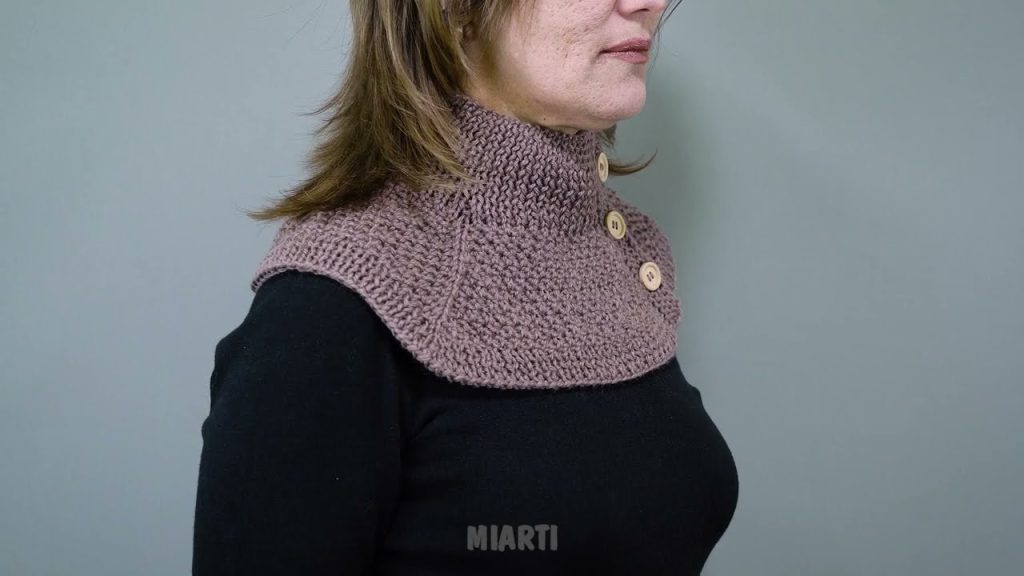
by Absolutely! Let’s go step by step. I’ll give you a detailed, beginner-friendly tutorial on how to make a knitted snood-collar with buttons. A snood-collar is like a combination of a scarf and a cowl—it wraps around your neck snugly, and adding buttons makes it adjustable and stylish.
Materials You’ll Need
- Yarn – Medium-weight (worsted) yarn works best for warmth and structure. Choose a soft yarn for comfort.
- Knitting needles – Size recommended on your yarn label (usually US 8 / 5mm for worsted).
- Buttons – 2–3 buttons, depending on the length of your snood.
- Tapestry needle – For weaving in ends and sewing buttons.
- Scissors
Optional: stitch markers to help you keep track of pattern repeats.
Step 1: Decide Dimensions
For a comfortable snood-collar:
- Width: 8–10 inches (20–25 cm)
- Length: 28–36 inches (70–90 cm) for a single wrap; longer if you want to double wrap.
- Button placement: Usually at one end, evenly spaced.
Step 2: Cast On Stitches
- Use a long-tail cast-on for a stretchy edge.
- Number of stitches: Depends on your desired width and yarn thickness.
- Example: For 9 inches wide with worsted yarn, cast on 30–40 stitches.
(Tip: Do a swatch to check your gauge: 4 inches = ~16 stitches.)
- Example: For 9 inches wide with worsted yarn, cast on 30–40 stitches.
Step 3: Choose Your Stitch Pattern
Some simple options:
- Garter Stitch (easy, cozy)
- Knit every row.
- Produces a stretchy, thick fabric.
- Rib Stitch (elastic, neat)
- K2, P2 across the row, repeat every row.
- Nice for a structured snood.
- Seed Stitch (textured, fancy)
- Row 1: K1, P1 across
- Row 2: P1, K1 across
- Repeat.
- Gives a bumpy texture and is very warm.
For beginners, garter stitch is easiest.
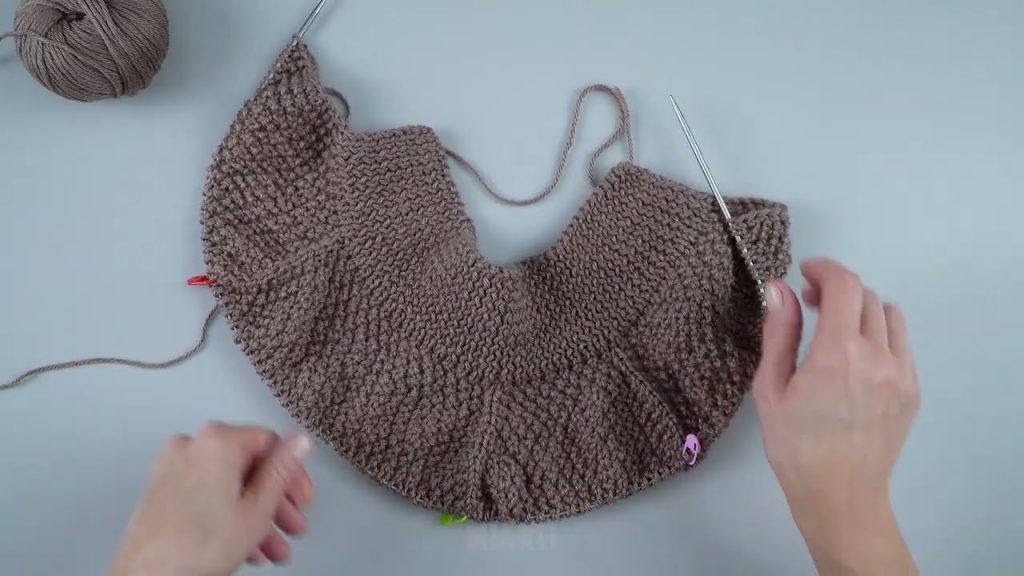
Step 4: Knit Until Desired Length
- Keep knitting until your piece reaches the length you want.
- Tip: Check the fit by wrapping around your neck occasionally.
Step 5: Bind Off
- Use a loose bind-off so the edge doesn’t curl.
- Garter stitch usually doesn’t curl, but rib and stockinette might.
Step 6: Add Buttons
- Fold your snood to determine where the buttons should go. Usually, you place them at one end and on the opposite end edge to overlap nicely.
- Mark spots evenly along the edge.
- Use a tapestry needle and yarn to sew buttons securely.
- Make sure they line up with buttonholes or spaces you’ve left in your knitting.
Optional: Create buttonholes in your knitting:
- When you reach the row where a button will go:
- K2tog, YO (yarn over) for one stitch hole.
- Continue knitting.

Step 7: Weave in Ends
- Use your tapestry needle to weave in any loose yarn ends neatly.
- Make sure the edges are tidy.
Step 8: Styling Tips
- Wrap around once for a loose, casual look.
- Wrap twice and button for a snug, warm fit.
- Mix textures by using different stitches or adding a fringe at the ends.
Tips for Success
- Gauge: Make a small swatch to check width and stretch.
- Stretchy bind-off: Prevents tight edges.
- Button spacing: Test by wrapping your snood before sewing buttons permanently.
- Yarn choice: Acrylic/wool blends are soft and washable; chunky yarn works faster.
If you want, I can also draw a simple diagram showing the snood layout, button positions, and how to wrap it—this makes it super easy to follow, even for beginners.
Watch tutorial: