by
by Easy, Quick, and Perfect for Both Daughters and Mothers
Here’s a clear, detailed, and friendly write-up you can use for a blog post, craft page, or class handout:
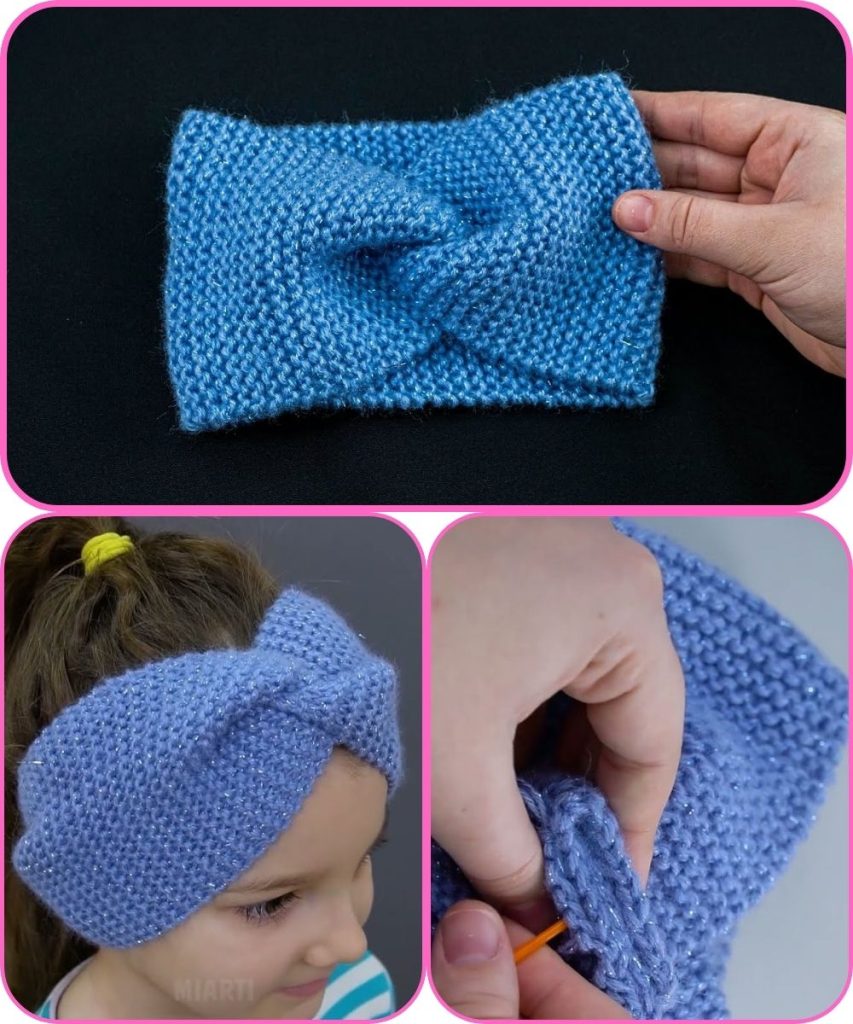
How to Make a Headband with Knitting Needles
Easy, Quick, and Perfect for Both Daughters and Mothers
Knitting a headband is one of the easiest and quickest projects for beginners and experienced knitters alike. With just a small amount of yarn and a pair of knitting needles, you can create a stylish and comfortable headband that fits both daughters and their mothers. This project is ideal when you want something handmade, practical, and beautiful—without spending hours knitting.
Why Knit a Headband?
A knitted headband is a great accessory for all ages. It keeps ears warm, holds hair neatly in place, and adds a cozy handmade touch to any outfit. Because headbands are stretchy, one simple pattern can easily fit children and adults, making it perfect for matching family accessories or gifts.
Materials You Will Need
- Medium-weight yarn (soft acrylic or wool works well)
- Knitting needles (size 4–5 mm / US 6–8)
- Scissors
- Yarn needle (for sewing and weaving in ends)
You only need a small amount of yarn, so this is also a great project for using leftovers.
Basic Stitches Used
This headband uses very simple stitches:
- Cast on
- Knit stitch
- Purl stitch
- Bind off
Even beginners can complete this project with confidence.

Step-by-Step Instructions
- Cast On
Cast on 12–16 stitches, depending on how wide you want the headband. Fewer stitches make a slimmer band, while more stitches create a wider, warmer one. - Knit the Pattern
A simple rib stitch works best because it stretches easily and fits different head sizes.- Row 1: Knit 2, Purl 2 (repeat to the end of the row)
- Row 2: Knit the knit stitches and purl the purl stitches
Repeat these rows until the headband measures about 18–20 inches (45–50 cm). The stretchiness of the rib stitch allows it to fit both children and adults comfortably.
- Check the Fit
Before binding off, gently stretch the headband around your head or your child’s head. It should fit snugly but not too tight. - Bind Off
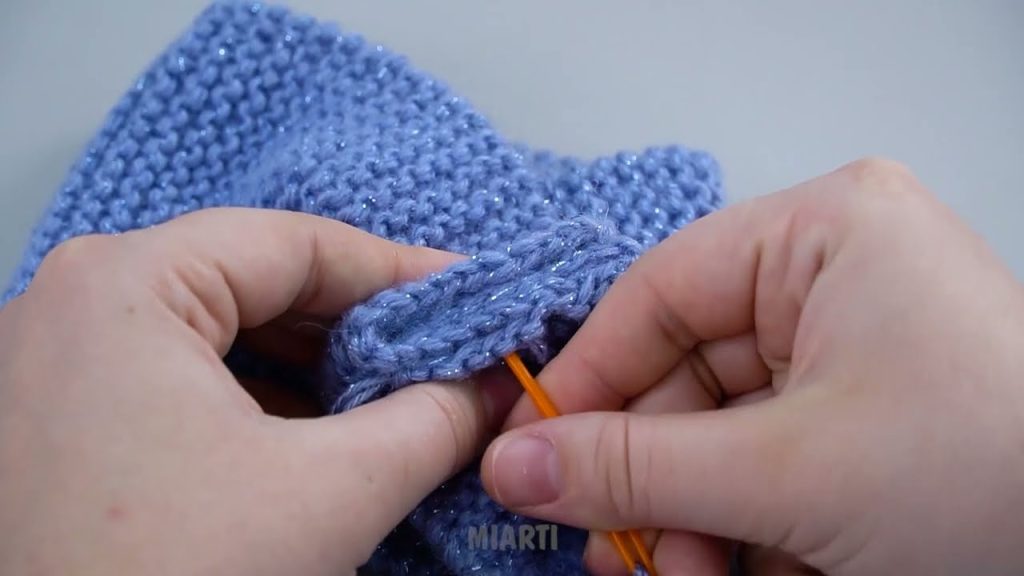
Bind off loosely to keep the edge flexible and comfortable. - Join the Ends
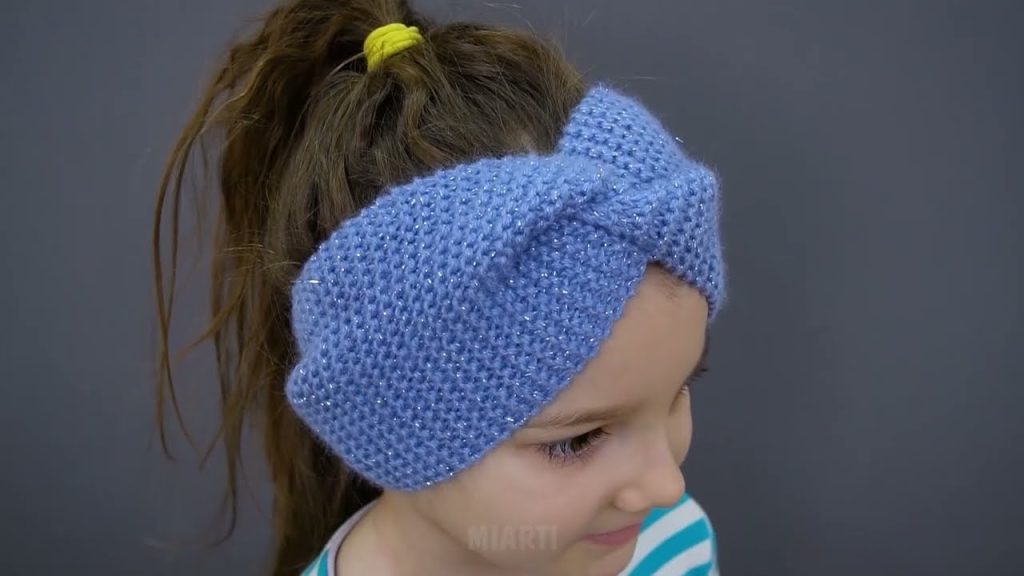
Fold the knitted piece in half and sew the two short ends together using a yarn needle. For a decorative look, you can twist the fabric once before sewing to create a trendy “twisted headband” style. - Finish
Weave in all loose ends and trim excess yarn. Your headband is now ready to wear!
Why This Headband Fits Everyone
The rib stitch creates natural elasticity, allowing the headband to stretch and adjust to different head sizes. This makes it ideal for both daughters and their mothers—no complicated sizing needed.
Final Thoughts
Knitting a headband with needles is a fast, enjoyable project that delivers beautiful results. In less than an hour, you can create a cozy, stylish accessory that works for all ages. Whether you’re making one for yourself, your daughter, or as a thoughtful handmade gift, this easy headband pattern is sure to be a favorite.
Watch tutorial: