 by
by Here’s a detailed, beginner-friendly tutorial you can use as a blog post, video script, or pattern explanation. I’ve written it in clear, simple language with step-by-step guidance.
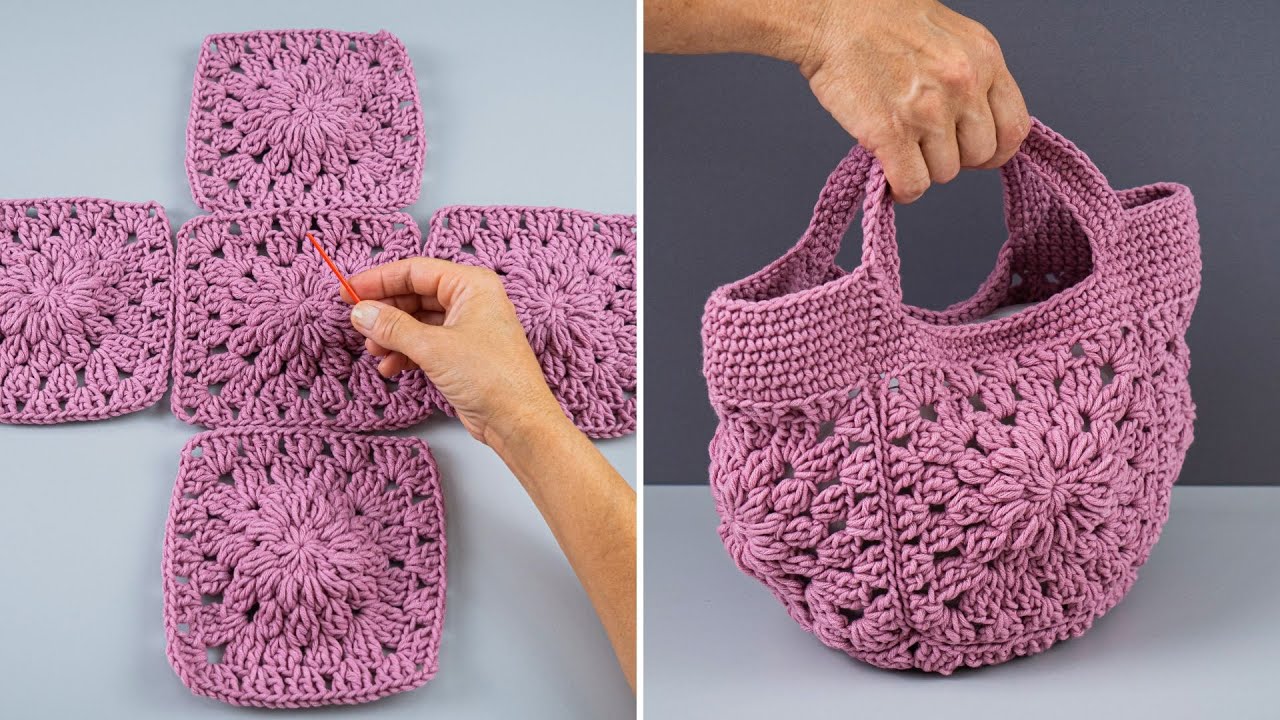
How to Make an Easy Crochet Bag
A Complete Tutorial for Beginners
Crocheting your own bag is a fun and rewarding project, especially if you’re a beginner. This easy crochet bag tutorial uses simple stitches, minimal shaping, and basic materials. By the end, you’ll have a stylish and practical handmade bag you can proudly use or gift.
Materials You Will Need
Before starting, gather the following supplies:
- Yarn: Medium weight (worsted weight / category 4) cotton or acrylic yarn
Cotton yarn is recommended for bags because it is strong and durable. - Crochet Hook: 4.5 mm – 5 mm (or size recommended on your yarn label)
- Scissors
- Yarn Needle (for weaving in ends)
- Stitch Marker (optional but helpful)
Basic Crochet Skills Required
This project is perfect for beginners and only requires basic stitches:
- Chain (ch)
- Single Crochet (sc)
- Slip Stitch (sl st)
If you know how to hold a hook and yarn, you’re ready to begin!

Step 1: Make the Foundation Chain
- Start by making a slip knot on your hook.
- Chain 30–40 stitches, depending on how wide you want your bag.
- Fewer chains = narrower bag
- More chains = wider bag
👉 Tip: Count your stitches carefully to keep the edges straight.
Step 2: Create the Base of the Bag
- Insert your hook into the second chain from the hook.
- Make one single crochet (sc) in each chain across.
- When you reach the last chain, do not turn.
- Continue working along the other side of the foundation chain, placing one single crochet in each stitch.
- Join with a slip stitch to the first stitch to form an oval base.
This oval shape will be the bottom of your bag.
Step 3: Build the Body of the Bag
- Chain 1 (this does not count as a stitch).
- Work single crochet in each stitch around.
- Do not increase—this will cause the bag to naturally form upward.
- Continue crocheting in rounds until the bag reaches your desired height
(usually 8–10 inches / 20–25 cm).
👉 Beginner Tip: Use a stitch marker to mark the first stitch of each round.
Step 4: Create the Bag Handles
- Crochet until you reach the spot where you want the handle to begin.
- Chain 10–15 stitches (depending on handle length).
- Skip the same number of stitches on the bag body.
- Continue single crocheting until you reach the second handle position.
- Repeat the chain and skip process for the second handle.
- Continue crocheting around, placing single crochet stitches into the chain spaces.
- Crochet 2–3 more rounds to strengthen the handles.
Step 5: Finish the Bag
- After completing the final round, slip stitch into the next stitch.
- Cut the yarn, leaving a 5–6 inch tail.
- Pull the yarn through and tighten.
- Use a yarn needle to weave in all loose ends securely.
Optional Customizations
You can easily personalize your crochet bag:
- Add a button or zipper
- Attach a fabric lining
- Use different stitch patterns for texture
- Add tassels, beads, or embroidery

Final Thoughts
This easy crochet bag is a perfect beginner project that builds confidence and skill. It’s simple, practical, and customizable, making it ideal for everyday use or as a thoughtful handmade gift. With just basic stitches and a little patience, you can create something beautiful with your own hands.
Happy crocheting! 🧶✨
If you want, I can:
- Simplify this into a short pattern
- Rewrite it for a YouTube video script
- Add images descriptions for each step
- Adjust it for kids or absolute beginners
Watch tutorial: