 by
by Here’s a simple, clear, and detailed guide to making a crochet hat using a relief stitch pattern, written for beginners or confident beginners.
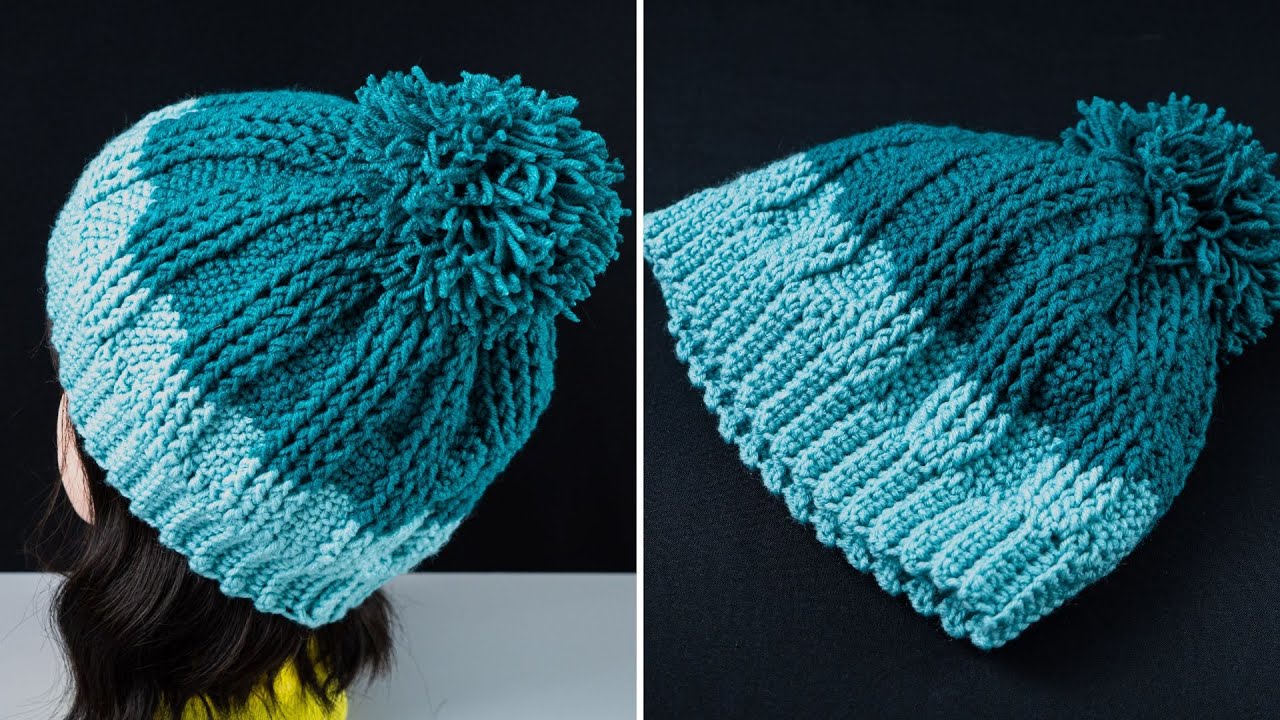
How to Make a Crochet Hat with a Relief Stitch Pattern (Simple Method)
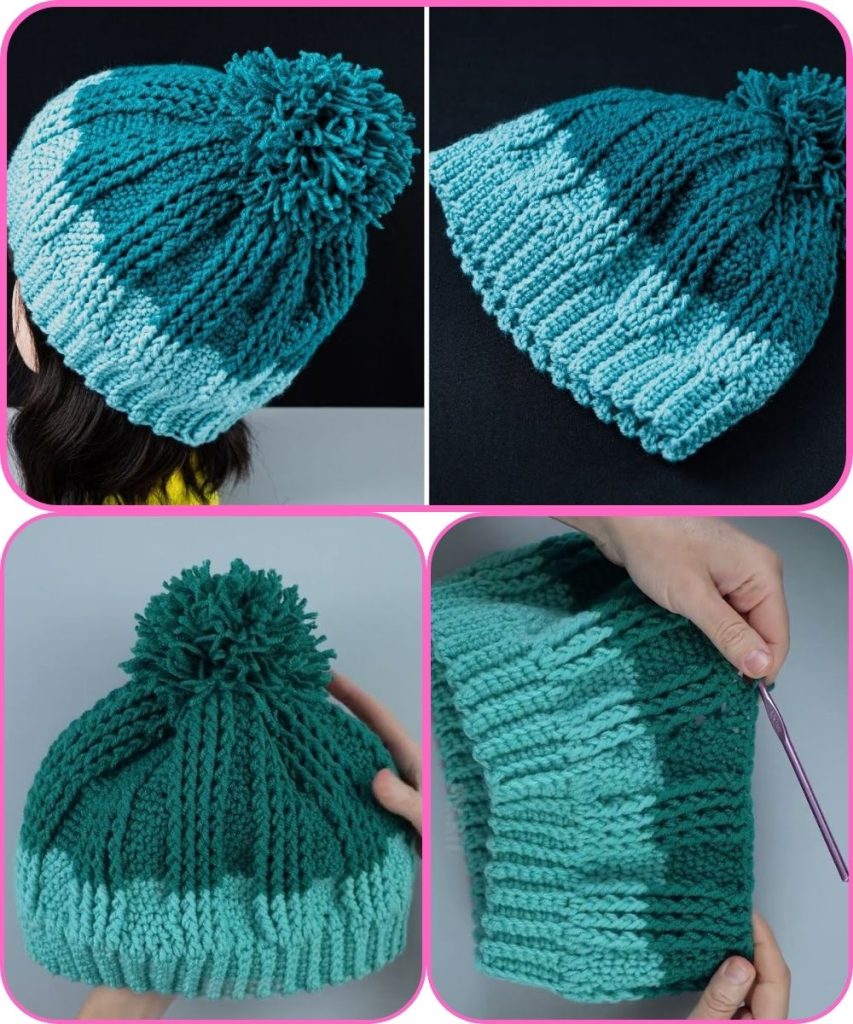
A relief stitch creates texture by working around the post of a stitch instead of into the top loops. The most common relief stitches are Front Post Double Crochet (FPDC) and Back Post Double Crochet (BPDC). These stitches give your hat a beautiful ribbed or raised design.
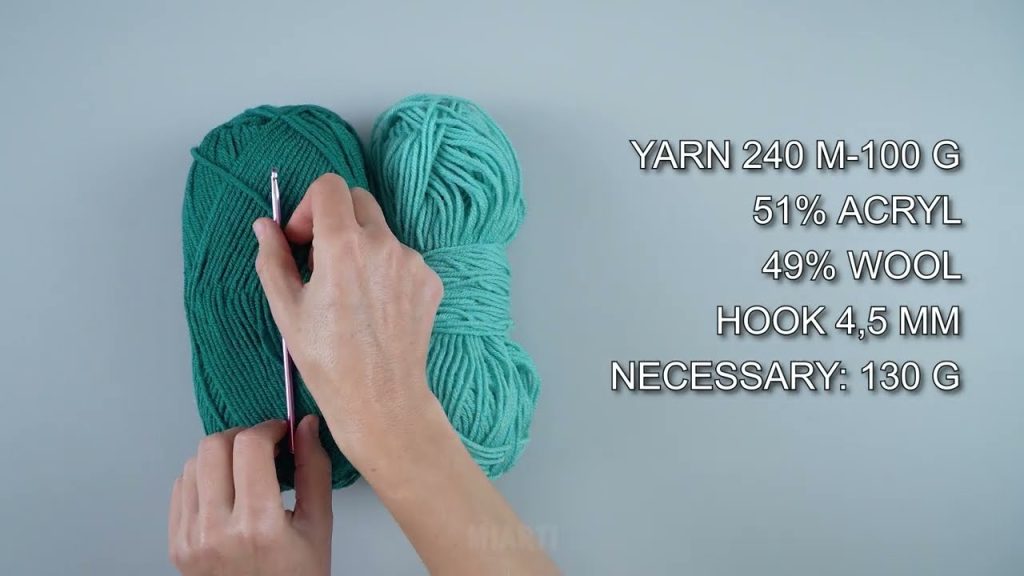
Materials Needed
- Medium-weight yarn (Category 4 / worsted weight)
- Crochet hook (usually 5.0 mm or 5.5 mm, check yarn label)
- Scissors
- Yarn needle
- Stitch marker (optional)
Crochet Skills You Should Know
- Chain (ch)
- Slip stitch (sl st)
- Single crochet (sc)
- Double crochet (dc)
- Front Post Double Crochet (FPDC)
- Back Post Double Crochet (BPDC)

Common Relief Stitches (Quick Explanation)
- FPDC: Yarn over, insert hook from front to back around the post of the stitch below, yarn over, pull through, complete like a double crochet.
- BPDC: Yarn over, insert hook from back to front around the post of the stitch below, yarn over, pull through, complete like a double crochet.
Alternating FPDC and BPDC creates a stretchy, ribbed texture—perfect for hats.
Step-by-Step Instructions
Step 1: Create the Hat Band (Bottom Ribbing)
- Chain 9–11 chains (this determines the height of the brim).
- Single crochet in the second chain from the hook and in each chain across.
- Chain 1, turn.
- Single crochet in the back loop only across.
- Repeat this row until the band fits comfortably around your head (about 20–22 inches for an adult).
- Join the short ends with slip stitches to form a ring.
👉 This creates a stretchy brim.

Step 2: Work the Hat Body
- Chain 2 (counts as first dc).
- Work double crochet evenly around the top edge of the band.
- Place about 1 dc in each row of the band.
- Join with a slip stitch.
- You should have around 60–72 stitches (adjust for size).
Step 3: Start the Relief Stitch Pattern
- Chain 2.
- FPDC in next stitch, BPDC in next stitch.
- Repeat from * to * around.
- Join with a slip stitch.
👉 This creates a ribbed texture.
Step 4: Continue the Pattern
- Repeat Step 3 for 5–7 inches, depending on how tall you want the hat.
- Always place FPDC stitches over FPDC and BPDC over BPDC to keep the pattern aligned.
Step 5: Shape the Crown (Top of the Hat)
- Chain 2.
- FPDC 2 together (decrease) around every few stitches.
- On the next round, decrease more frequently.
- Continue until the top opening is small.
- Cut yarn, leaving a long tail.
- Thread yarn needle through remaining stitches and pull tight.
- Secure and weave in ends.
Tips for Success
- Use a light-colored yarn to clearly see relief stitches.
- Keep your tension relaxed—relief stitches are tighter than normal stitches.
- Try a FPDC/BPDC 2×2 pattern (two front post, two back post) for a chunkier look.
- Add a pom-pom or folded brim for extra style.
Final Result
You’ll have a stretchy, textured crochet hat with a professional-looking relief stitch pattern that’s warm, stylish, and beginner-friendly.
If you want, I can:
- Simplify this into a short pattern
- Adjust it for kids or babies
- Add photos/diagrams guidance
- Turn it into a written pattern format
Watch tutorial: