 by
by Here is a clear, detailed, and beginner-friendly step-by-step guide you can use for a blog post, tutorial, or pattern description.
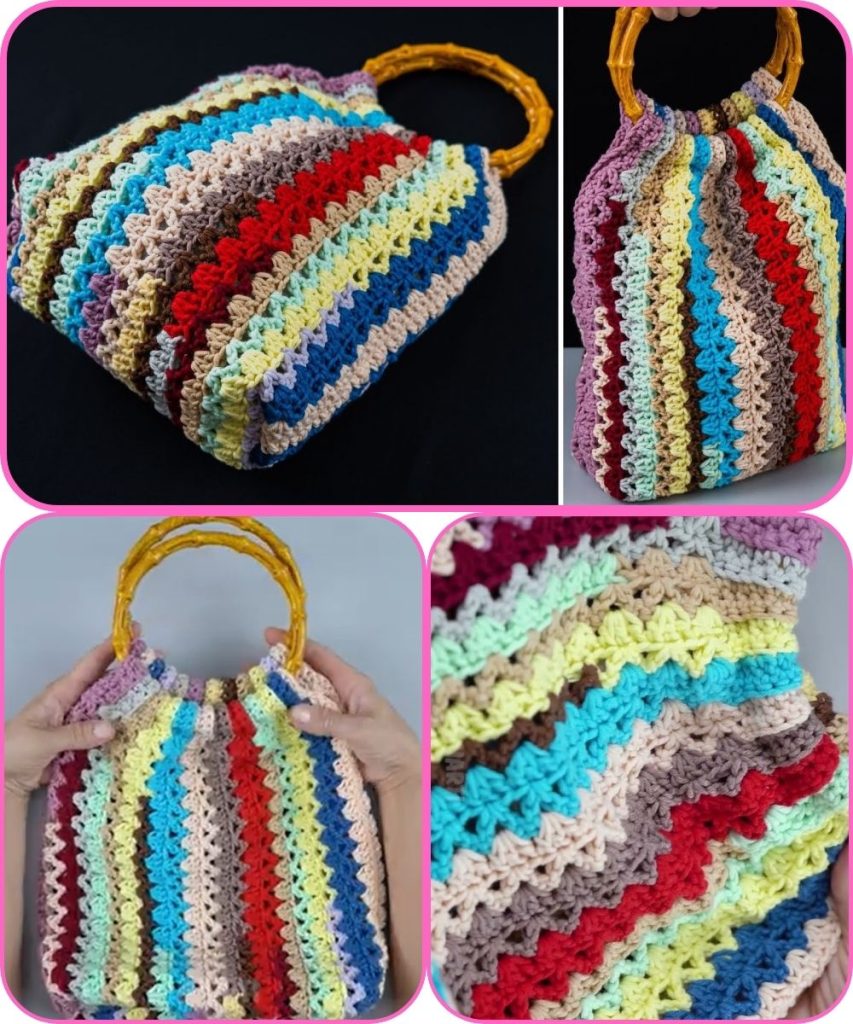
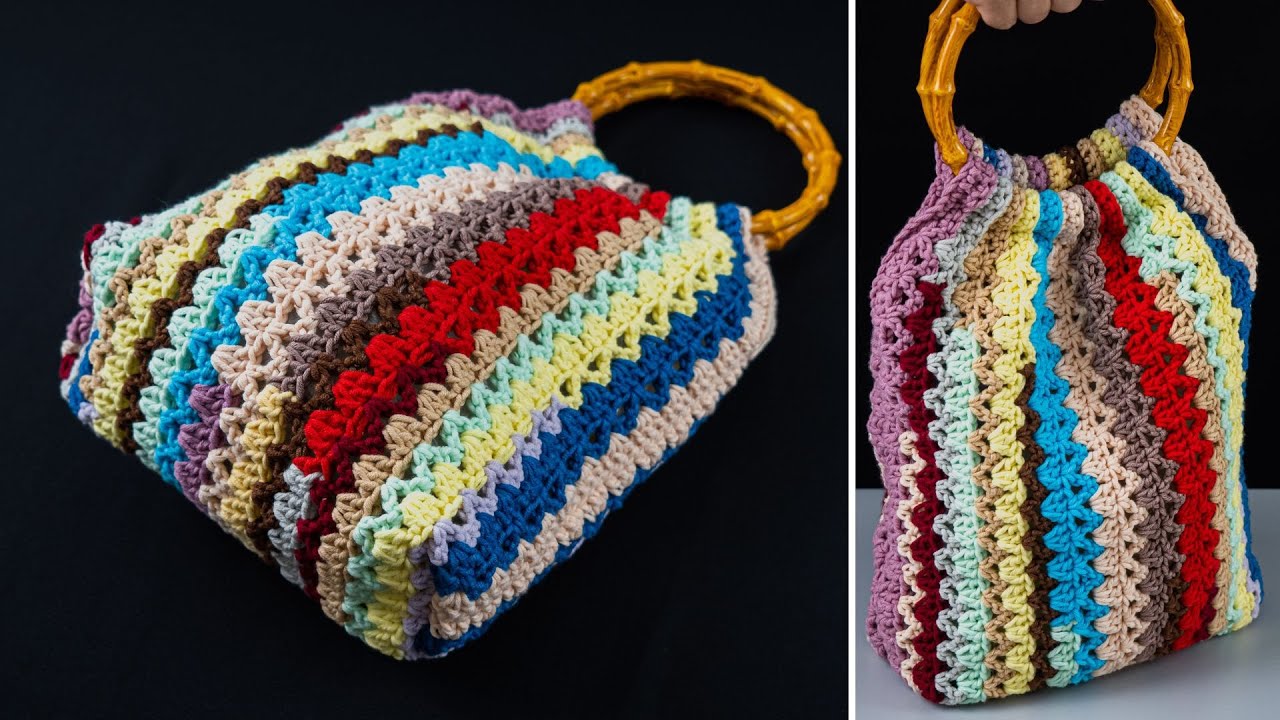
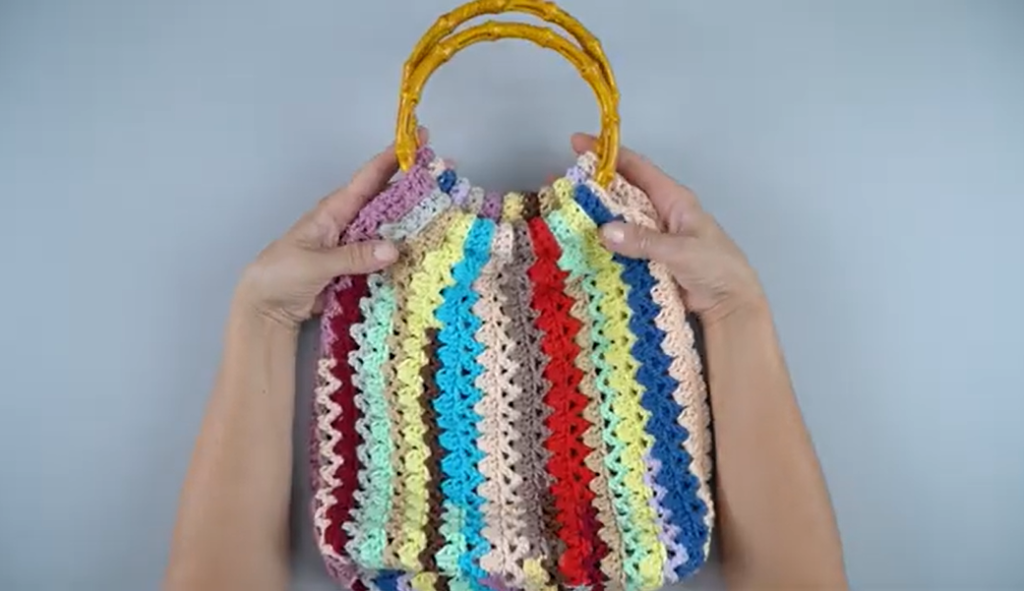
How to Crochet a Summer Tote Bag from Yarn Scraps Easily
Crocheting a summer tote bag from yarn scraps is a fun, eco-friendly, and creative project. It’s perfect for using leftover yarn, experimenting with colors, and making a lightweight bag for shopping, beach trips, or everyday use. Best of all, this project is simple enough for beginners and very forgiving—perfect if you’re still learning.
This guide will walk you through the process step by step, using easy stitches and simple construction.
Why This Is a Great Beginner Project
- Uses leftover yarn scraps
- No complicated shaping
- Simple stitches and repeats
- Color changes hide small mistakes
- Lightweight and practical
- Easy to customize in size and style
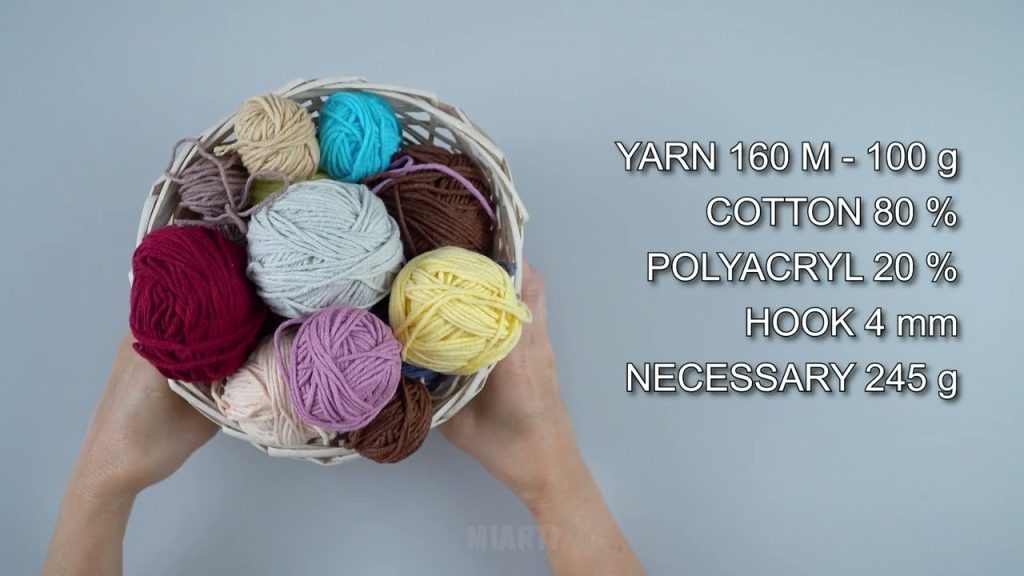
Materials You’ll Need
Before you start, gather the following:
- Yarn scraps (cotton or cotton blends are best)
– Use similar weight yarns for even results - Crochet Hook: 4–5 mm (adjust to match yarn)
- Scissors
- Yarn Needle
- Stitch Marker (optional)
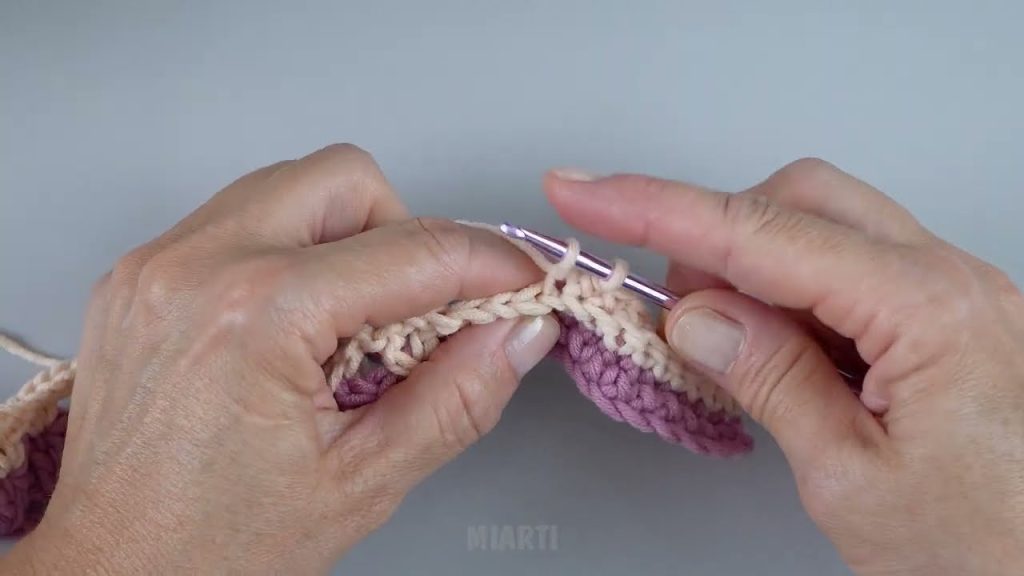
Stitches and Skills Used
This project is beginner-friendly and uses basic stitches:
- Chain stitch (ch)
- Slip stitch (sl st)
- Single crochet (sc)
- Double crochet (dc)
If you can chain and double crochet, you can make this bag!
Step-by-Step Instructions
Step 1: Plan Your Color Layout
Before crocheting, sort your yarn scraps by color and thickness.
You can:
- Change colors every round
- Use one color per section
- Mix randomly for a playful look
👉 Tip: Secure yarn ends well—tote bags get a lot of use.
Step 2: Crochet the Base of the Tote
- Chain 25–35 stitches, depending on desired bag width.
- Single crochet in the second chain from the hook and across.
- Crochet around both sides of the chain to form an oval base.
- Increase at both ends while crocheting in rounds.
- Continue until the base is the size you want.
This creates a strong foundation for your tote bag.
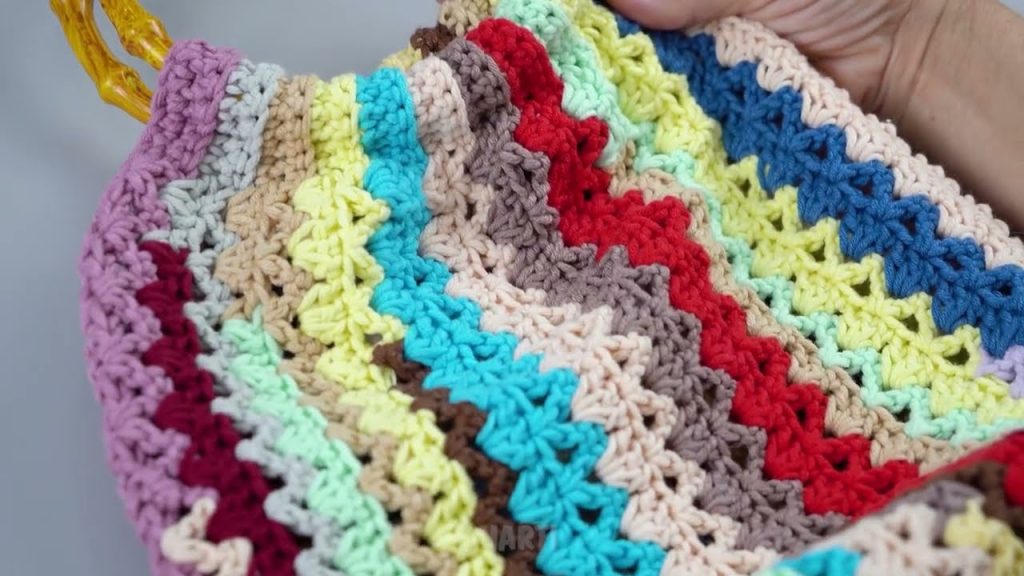
Step 3: Build the Body of the Bag
- Switch to double crochet for a light, summery feel.
- Crochet in continuous rounds without increasing.
- Change yarn scraps whenever a color runs out.
- Keep crocheting until the bag reaches your preferred height (30–35 cm).
👉 Tip: Crochet loosely to keep the bag flexible and lightweight.
Step 4: Add Simple Texture (Optional)
For extra style, you can:
- Work one round of single crochet
- Use back-loop-only stitches
- Add a round of mesh stitches (chain 1, skip 1)
These small details add personality without complexity.
Step 5: Strengthen the Top Edge
- Crochet 2–3 rounds of single crochet
- This helps the bag hold its shape and supports the handles
Step 6: Crochet the Handles
Simple Handle Method:
- Single crochet to the handle position.
- Chain 30–40 stitches.
- Skip the same number of stitches and continue crocheting.
- Repeat for the second handle.
- Crochet one more round of single crochet over the chains to reinforce.
Step 7: Finish the Tote Bag
- Slip stitch to close the round
- Fasten off yarn
- Weave in all ends securely
Your summer tote bag is now ready to use!
Easy Customization Ideas
- Make it larger for beach days
- Add a fabric lining for small items
- Crochet a matching pouch
- Add tassels or pom-poms
- Use neutral scraps for a modern look
Beginner Tips for Best Results
- Use cotton yarn for strength
- Keep yarn weights similar
- Secure all color changes tightly
- Don’t worry about perfect color matching—scrap bags are meant to be fun!
Final Thoughts
Crocheting a summer tote bag from yarn scraps is an easy and rewarding project that’s perfect for beginners. It’s a great way to reduce waste, practice stitches, and create a stylish, functional accessory at the same time.
Once you make one, you’ll want to keep all your yarn scraps just to make more!
If you’d like, I can also:
- Create a short printable pattern
- Design a mesh or beach version
- Add a step-by-step photo guide
- Help with strap or lining options
Watch tutorial: