by
by Here’s a detailed, beginner-friendly guide for making a simple crochet hat using an easy stitch pattern. This hat is cozy, stylish, and perfect for anyone just starting out with crochet.
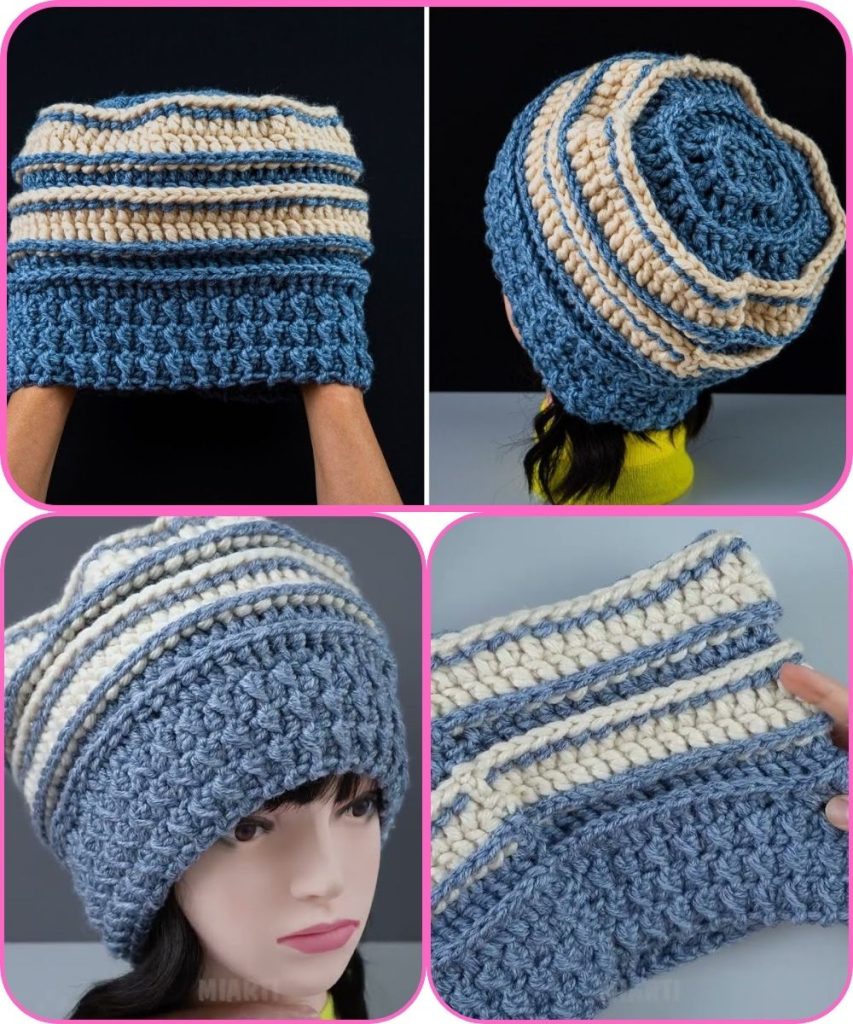
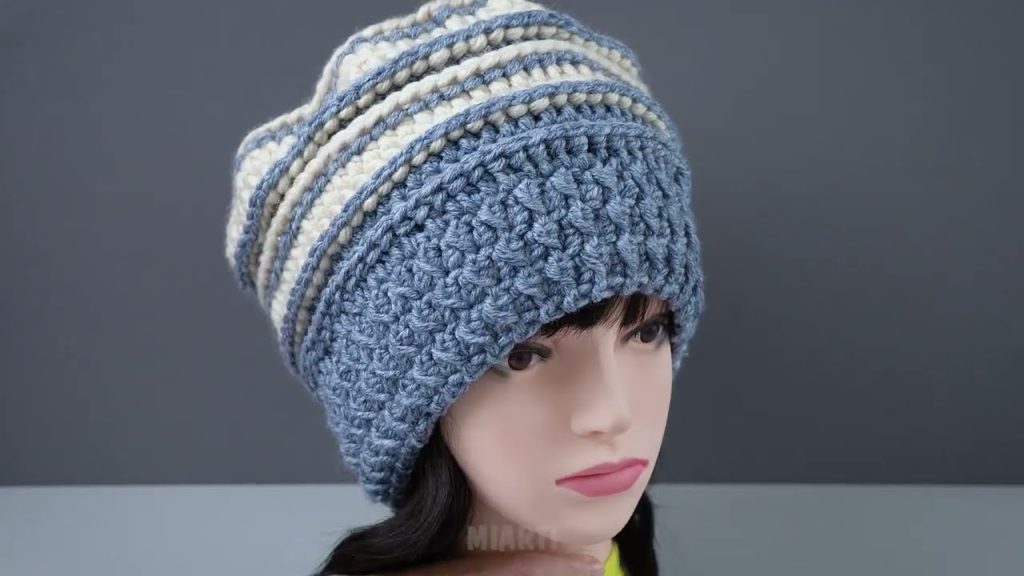
How to Make a Simple Crochet Hat for Beginners – Easy Stitch Pattern
Crochet hats are one of the fastest and most satisfying projects for beginners. With just a few basic stitches, you can create a warm, wearable hat that looks great and is perfect for gifting or personal use.
This tutorial uses an easy stitch pattern to make the process simple, even if you’ve never made a hat before.
Why This Hat Is Beginner-Friendly
- Uses basic crochet stitches: chain, single crochet, and double crochet
- Minimal shaping required
- Quick to make (1–3 hours depending on yarn thickness)
- Works with all sizes: adults, teens, and kids
- Flexible: can be slouchy or snug depending on preference
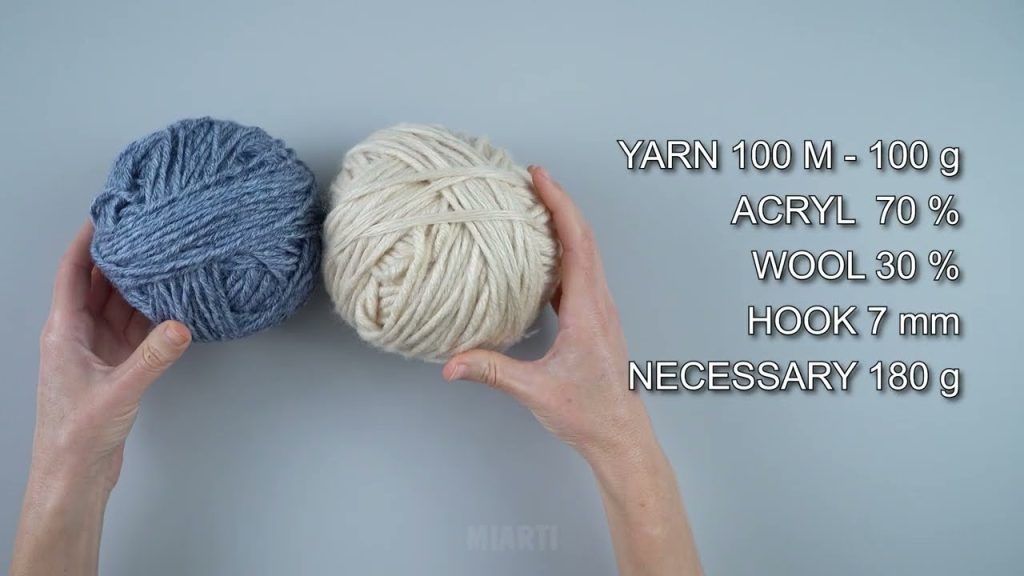
Materials You’ll Need
- Yarn: Medium-weight (worsted) yarn; cotton or acrylic for comfort
- Crochet Hook: 5–6 mm (adjust based on yarn label)
- Scissors
- Yarn needle for weaving in ends
- Optional: Stitch marker to mark the start of rounds
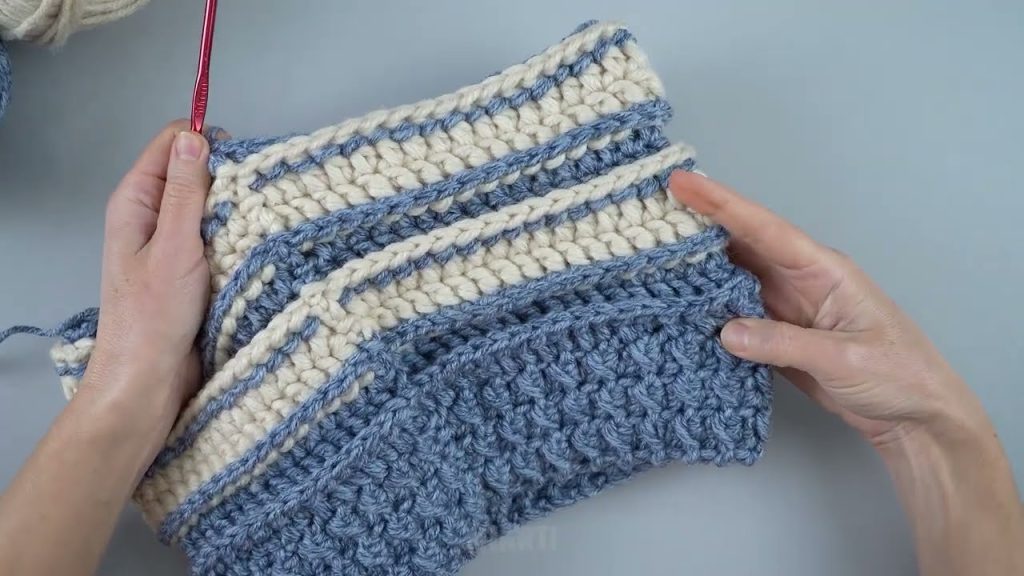
Stitches and Techniques Used
- Chain stitch (ch)
- Slip stitch (sl st)
- Single crochet (sc)
- Double crochet (dc)
Even complete beginners can handle this project with just these basic stitches.
Step-by-Step Instructions
Step 1: Measure Head Circumference
- Adult size: 55–60 cm (22–24 inches)
- Child size: 50–55 cm (20–22 inches)
- Adjust your starting chain to fit comfortably around the head.
Step 2: Start the Hat with a Magic Ring
- Create a magic ring (or chain 4 and join into a loop).
- Ch 3 (counts as first dc), then work 11 dc into the ring.
- Join with a sl st to top of starting ch-3.
- You now have 12 stitches in the first round.
Step 3: Increase for the Crown
- Round 2: Ch 3, 2 dc in each stitch around. Join. (24 sts)
- Round 3: Ch 3, dc in next stitch, 2 dc in next stitch, repeat around. Join. (36 sts)
- Round 4: Ch 3, dc in next 2 stitches, 2 dc in next stitch, repeat around. Join. (48 sts)
Continue increasing in this pattern until the crown reaches the width you need for the head.
Step 4: Work the Body of the Hat
- Once the crown is the right size, stop increasing.
- Work dc in each stitch around for each round until the hat reaches desired height (usually 18–20 cm from the top for adults).
- Optional: For texture, alternate rows of dc and sc, or work front loop only stitches for a ribbed effect.
Step 5: Finish the Hat
- Join the last round with a slip stitch.
- Fasten off and weave in all yarn ends using a yarn needle.
- Optional: Add a pom-pom for decoration or fold up the bottom edge to create a cuff.
Tips for Beginners
- Use medium-weight yarn and a suitable hook for faster progress
- Keep stitches even for a smooth, comfortable fit
- Use stitch markers to track rounds, especially for the crown increases
- Start with a small sample swatch to practice the stitch pattern if needed
Easy Customizations
- Make it slouchy by working a few extra rounds before finishing
- Add stripes using different colors every few rounds
- Use chunky yarn for a thicker, faster-to-knit hat
- Add ribbing or textured stitches for visual interest
- Decorate with buttons, beads, or a pom-pom
Final Thoughts
A simple crochet hat with an easy stitch pattern is perfect for beginners. With basic stitches and straightforward crown shaping, you can create a cozy, stylish hat quickly.
Once you finish your first hat, you can experiment with colors, textures, lengths, and embellishments to make an entire collection of handmade hats!
If you want, I can also create a full printable beginner pattern with exact stitch counts, round-by-round instructions, and crown shaping chart for this crochet hat, ready to follow step by step.
Watch tutorial: