 by
by Below is a clear, detailed, and beginner-friendly step-by-step tutorial you can use as a blog post, written pattern, or video narration.
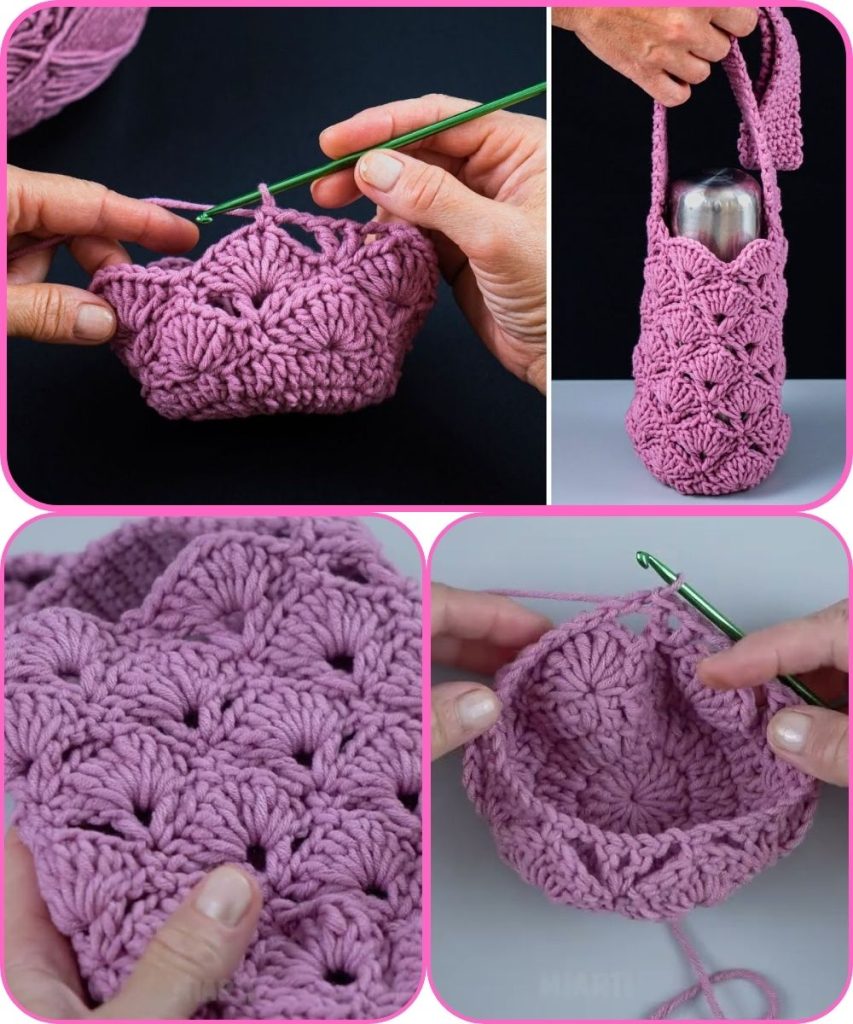
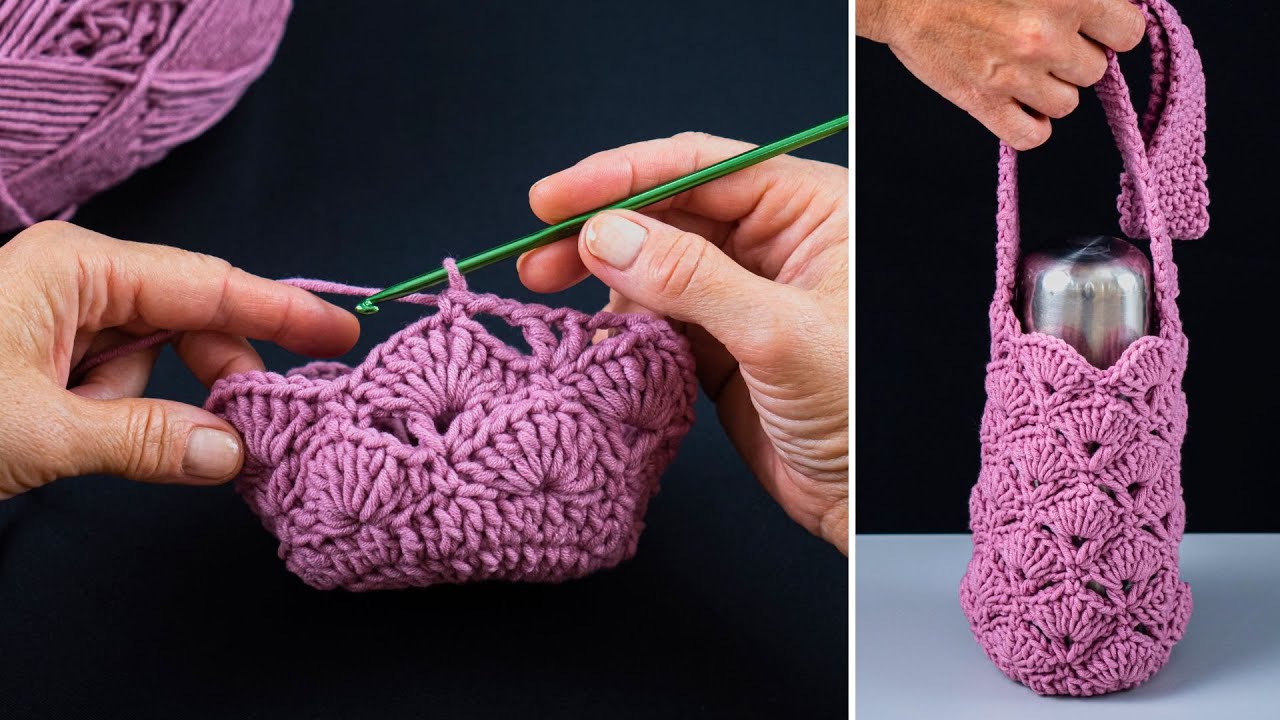
How to Make an Easy Crochet Bottle Bag or Phone Bag
A step-by-step tutorial for beginners
This easy crochet bottle or phone bag is a quick and practical project that works up fast and uses only basic stitches. It’s perfect for carrying a water bottle, phone, or small essentials, and it’s great for beginners or as a handmade gift.
Skill Level
Beginner
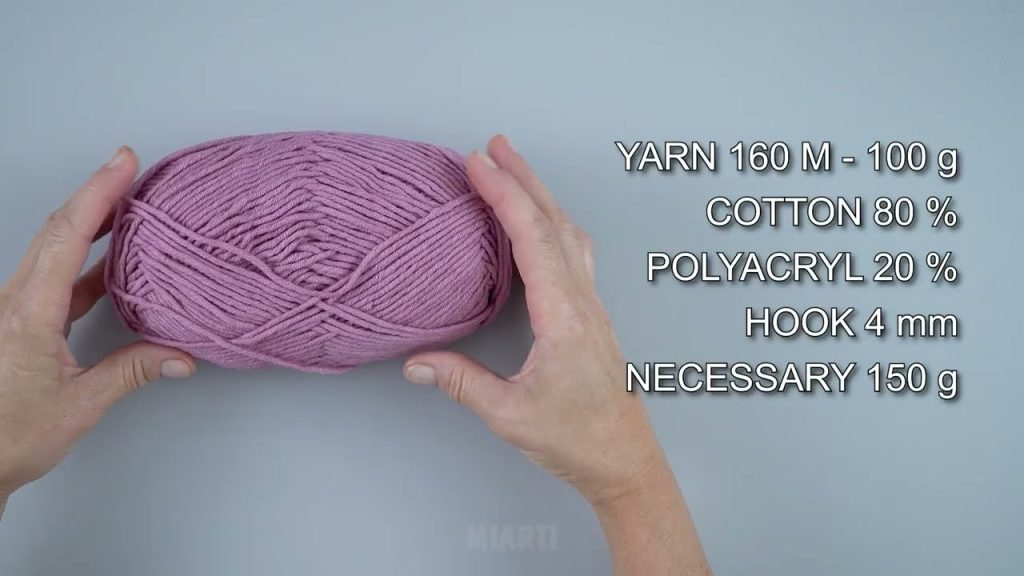
Materials Needed
- Medium-weight yarn (Category 4 – cotton recommended for strength)
- Crochet hook: 4.5–5.0 mm
- Scissors
- Yarn needle
- Stitch marker (optional)
- Button or drawstring cord (optional)
Crochet Abbreviations (US Terms)
- ch – chain
- sl st – slip stitch
- sc – single crochet
- dc – double crochet
- inc – increase (2 sc in same stitch)
- st(s) – stitch(es)
Finished Size (Adjustable)
- Height: 6–8 inches
- Width: 3–4 inches
Perfect for a phone or standard water bottle. Size can easily be adjusted.
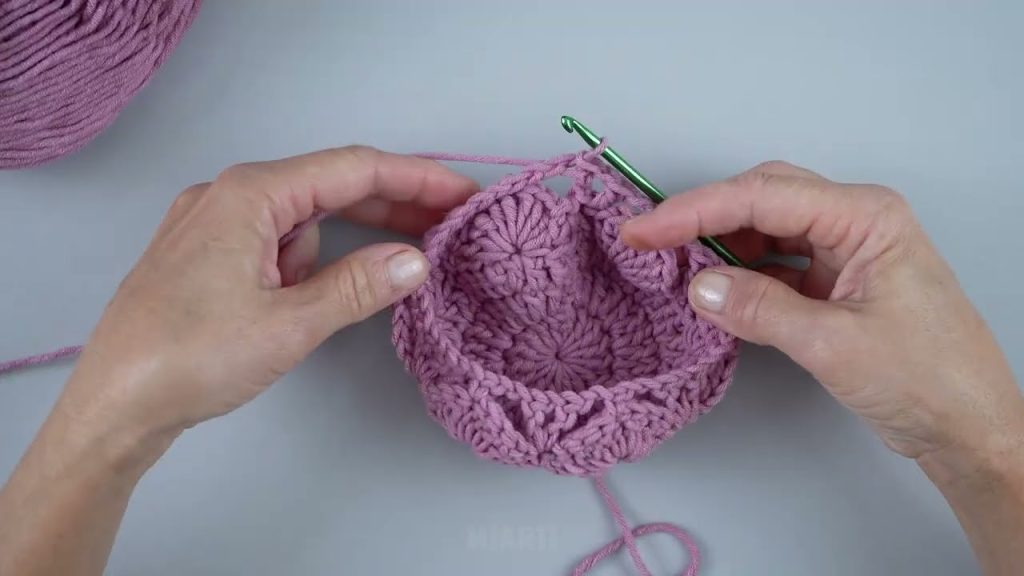
Step 1: Crochet the Base (Circle)
Round 1
- Make a magic ring.
- Work 6 sc into the ring.
- Join with sl st. (6 sts)
Round 2
- Ch 1.
- Inc in each stitch around (2 sc in each st).
- Join. (12 sts)
Round 3
- Ch 1.
- 1 sc, inc — repeat around.
- Join. (18 sts)
Round 4
- Ch 1.
- 2 sc, inc — repeat around.
- Join. (24 sts)
Stop increasing when the base is wide enough to fit your bottle or phone.
Step 2: Build the Bag Body
Round 5
- Ch 1.
- Sc in back loop only (BLO) around.
- Join.
(This creates a neat edge and helps the bag stand up.)
Rounds 6–15
- Ch 1.
- Sc in each stitch around.
- Join.
Continue until the bag reaches your desired height.
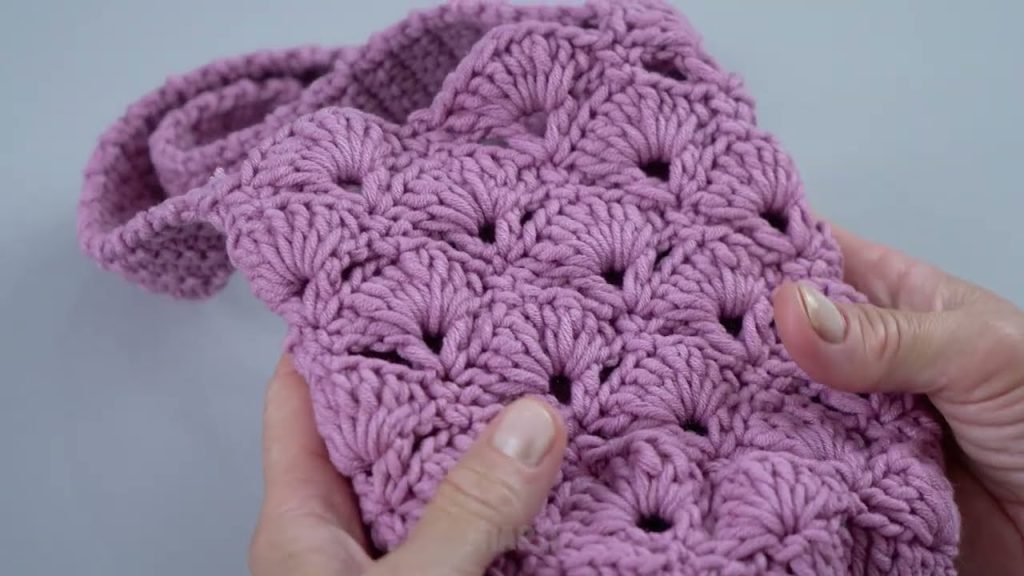
Step 3: Optional Pattern Variation
For a lighter, breathable bag:
- Replace sc rounds with dc rounds
- Or alternate sc and ch-1 spaces
Step 4: Create the Top Edge
Round 16
- Ch 1.
- Sc, ch 1 — repeat around.
- Join.
This round is perfect for adding a drawstring if desired.
Step 5: Make the Strap
Strap
- Attach yarn to the side of the bag.
- Ch 80–120 (adjust length for crossbody or shoulder strap).
- Sc in the 2nd chain from hook and across.
- Attach to the opposite side of the bag with sl st.
- Fasten off.
Step 6: Optional Drawstring
- Ch 90.
- Sl st into each chain.
- Weave the cord through the ch-1 spaces around the top.
- Tie ends together.
Step 7: Finishing
- Fasten off and weave in all loose ends
- Stretch slightly to shape
- Add a button, bead, or tassel if desired
Final Result
You now have a simple, stylish crochet bottle or phone bag—perfect for everyday use, travel, festivals, or gifts. This versatile pattern is easy to customize with different yarns, colors, or stitch patterns.
Great for:
✔ Beginners
✔ Scrap yarn projects
✔ Quick handmade gifts
✔ Market or craft-fair items
If you’d like, I can:
- Make a very short beginner version
- Turn this into a PDF pattern
- Write a YouTube or Instagram Reel script
- Adjust it for kids, mini, or large bottle sizes
Watch tutorial: