 by
by Absolutely! Here’s a clear, detailed, beginner-friendly tutorial you can use for a blog post, pattern description, or teaching guide.
How to Make a Simple Crochet Bag – Even a Beginner Can Handle It! 🧶👜
If you’re new to crochet and want a project that’s easy, useful, and fun, a simple crochet bag is the perfect choice. This bag uses basic stitches, works up quickly, and can be customized in size and color. With just a little practice, you’ll have a beautiful handmade bag you’ll be proud of!
🧵 Materials You’ll Need
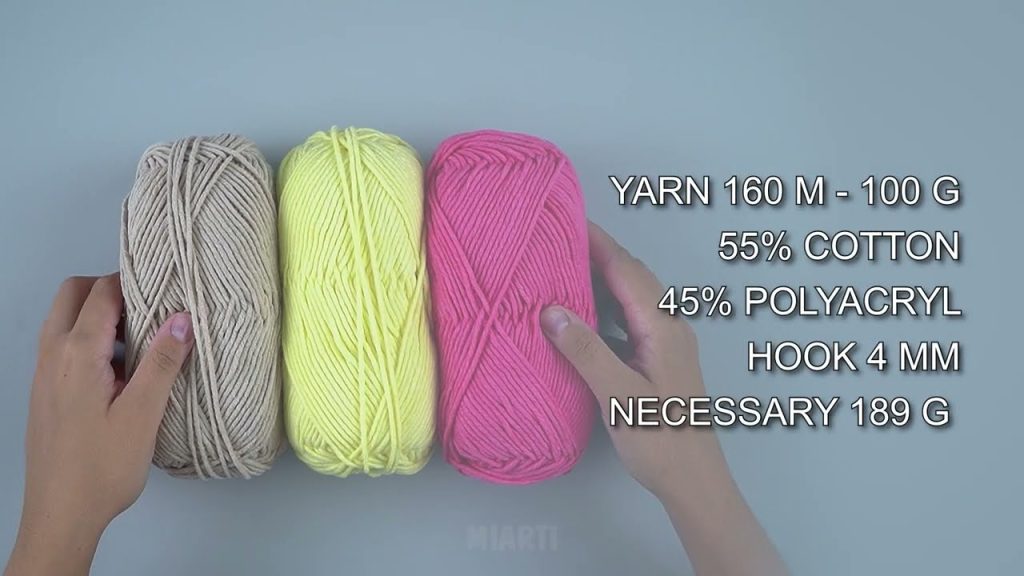
- Medium-weight yarn (cotton yarn is best for bags)
- Crochet hook (4–5 mm)
- Scissors
- Yarn needle
- Stitch marker (optional)
💡 Cotton yarn is strong and helps the bag keep its shape.
📘 Basic Crochet Stitches Used
This project is ideal for beginners and uses only simple stitches:
- Chain (ch)
- Slip stitch (sl st)
- Single crochet (sc)
(You can also use half double crochet for a slightly faster project.)
🪄 Step-by-Step Instructions
Step 1: Crochet the Base
- Chain 25–30 stitches (adjust for bag width).
- Single crochet in the second chain from the hook.
- Continue sc across.
- Chain 1, turn.
- Repeat rows until the base measures about 25–30 cm (10–12 inches) long.
This creates a sturdy rectangular base.
Step 2: Build the Bag Body
- Chain 1 and crochet single crochet evenly around the base.
- Place a stitch marker at the start of the round.
- Continue crocheting in the round without increasing.
- Work until the bag reaches your desired height (about 20–25 cm / 8–10 inches).
👉 The sides will naturally curl upward, forming the bag shape.
👜 Step 3: Create the Handles
- Crochet until you reach where the first handle will be.
- Chain 20–30 stitches (depending on handle length).
- Skip the same number of stitches on the bag.
- Single crochet into the next stitch.
- Repeat on the opposite side for the second handle.
- Crochet 1–2 more rounds of single crochet to strengthen the handles.

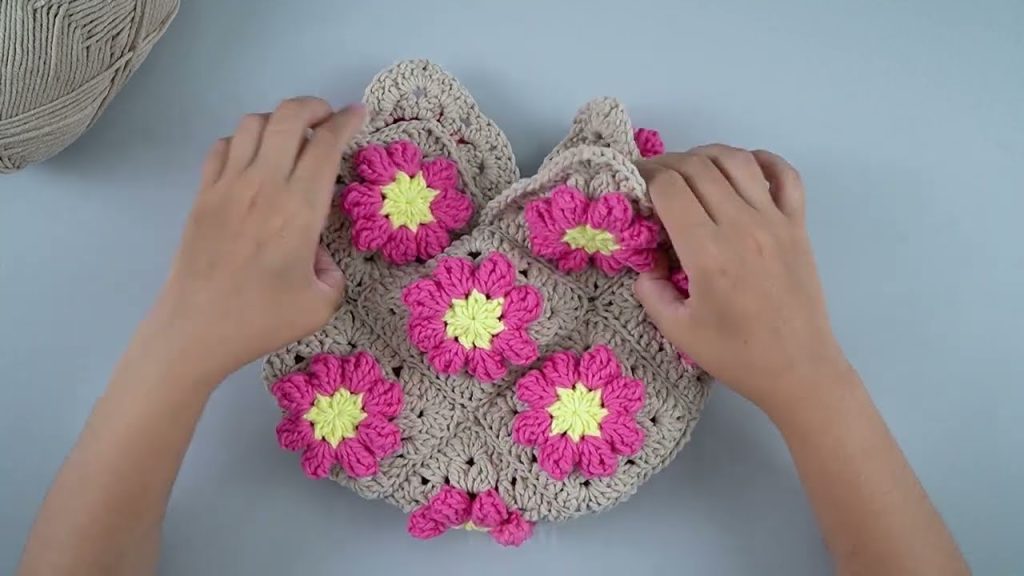
🎀 Step 4: Add a Simple Border (Optional)
- Crochet one final round of slip stitches or single crochet for a clean edge.
- You can also switch to a contrasting color for a decorative look.
✨ Step 5: Finishing Touches
- Fasten off and weave in all loose ends.
- Optional extras:
- Add a fabric lining
- Attach a button or magnetic snap
- Decorate with tassels or charms
🌸 Beginner Tips
- Keep your stitches tight for a strong bag.
- Count stitches to keep edges straight.
- Choose light-colored yarn so stitches are easier to see.
- Don’t rush—enjoy the process!
🎉 Final Thoughts
This simple crochet bag is a perfect beginner project that’s practical, stylish, and easy to make. Once you finish one, you’ll feel confident enough to try different stitches, sizes, and designs.
If you’d like, I can:
- Turn this into a short printable pattern
- Adapt it into a market bag or mini bag
- Create a step-by-step video tutorial outline
Watch tutorial: