 by
by Of course! Here’s a clear, detailed, beginner-friendly tutorial you can use for a blog post, pattern description, or teaching guide.
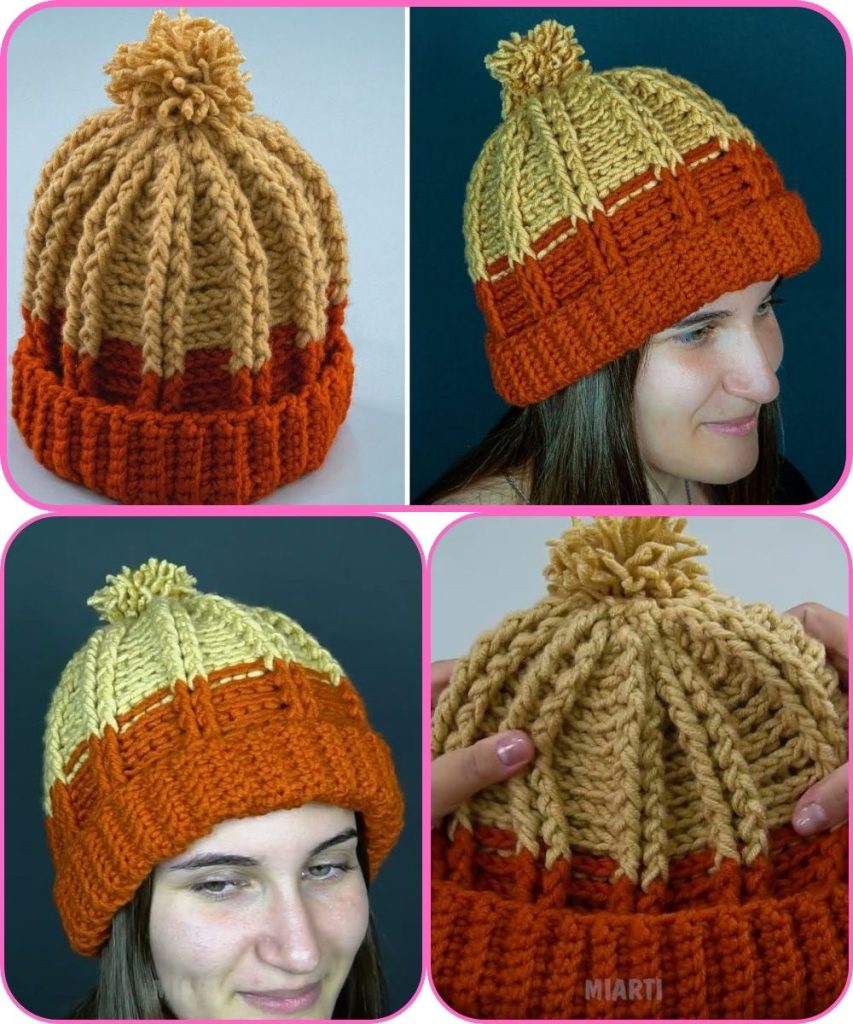
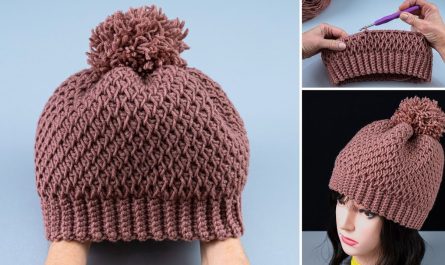
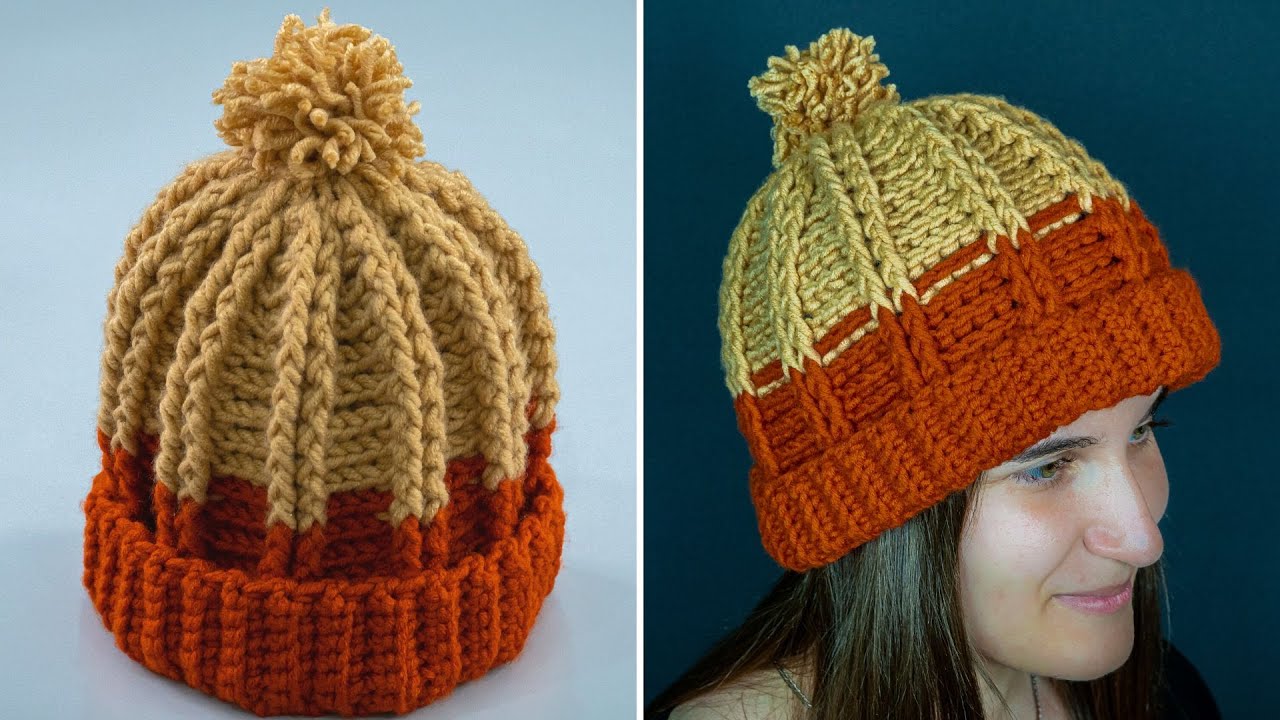
How to Make a Beautiful Crochet Hat for Everyone – Even a Beginner Can Handle It! 🧶🧢
A crochet hat is one of the best projects for beginners. It’s practical, quick to make, and easy to customize for any age or style. This tutorial walks you through each step using simple stitches, so even if you’re brand new to crochet, you can confidently create a beautiful handmade hat.
🧵 Materials You’ll Need
- Medium-weight yarn (worsted weight; acrylic or wool blend works well)
- Crochet hook (5–5.5 mm)
- Scissors
- Yarn needle
- Stitch marker (optional)
💡 Choose soft yarn so the hat feels comfortable on the head.
📘 Basic Crochet Stitches Used
This hat is perfect for beginners and uses only basic stitches:
- Magic ring (or chain ring)
- Chain (ch)
- Slip stitch (sl st)
- Single crochet (sc) or Half double crochet (hdc)
🪄 Step-by-Step Instructions
Step 1: Start at the Top (Crown)
- Make a magic ring.
- Chain 2.
- Work 10–12 half double crochet (hdc) into the ring.
- Join with a slip stitch and place a stitch marker.
👉 This forms the top of the hat.
Step 2: Increase to Shape the Hat
You will increase evenly to create a flat circle.
- Round 2: 2 hdc in each stitch (20–24 stitches)
- Round 3: 1 hdc, 2 hdc in next stitch repeat around
- Round 4: 2 hdc, 2 hdc in next stitch repeat around
Continue increasing until the circle measures 16–18 cm (6–7 inches) in diameter for an adult.
🧢 Step 3: Crochet the Hat Body
- Stop increasing.
- Crochet 1 hdc in each stitch around.
- Continue working in rounds until the hat reaches the desired length:
- About 18–20 cm (7–8 inches) for adults
👉 The hat will naturally form a smooth, rounded shape.
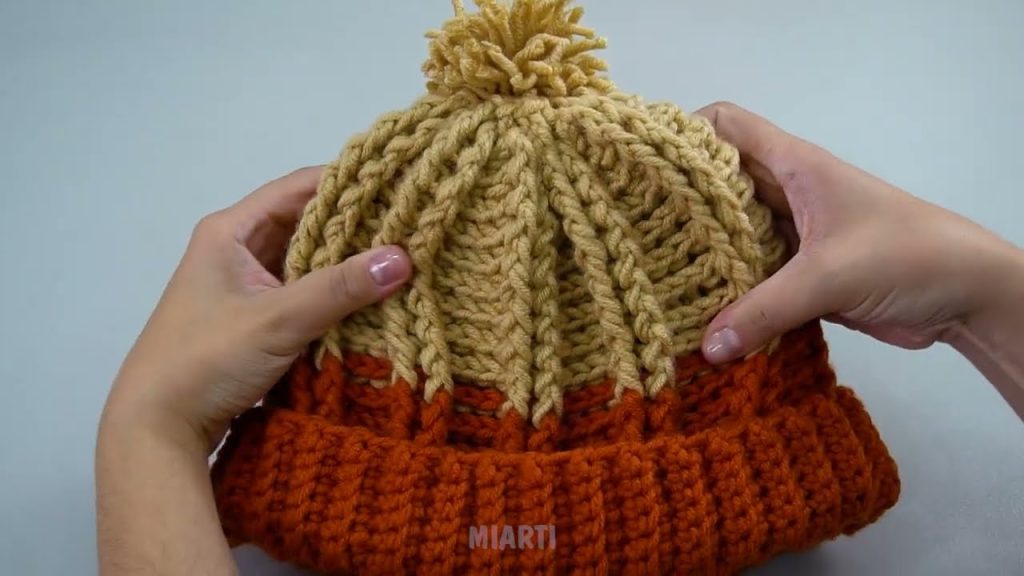
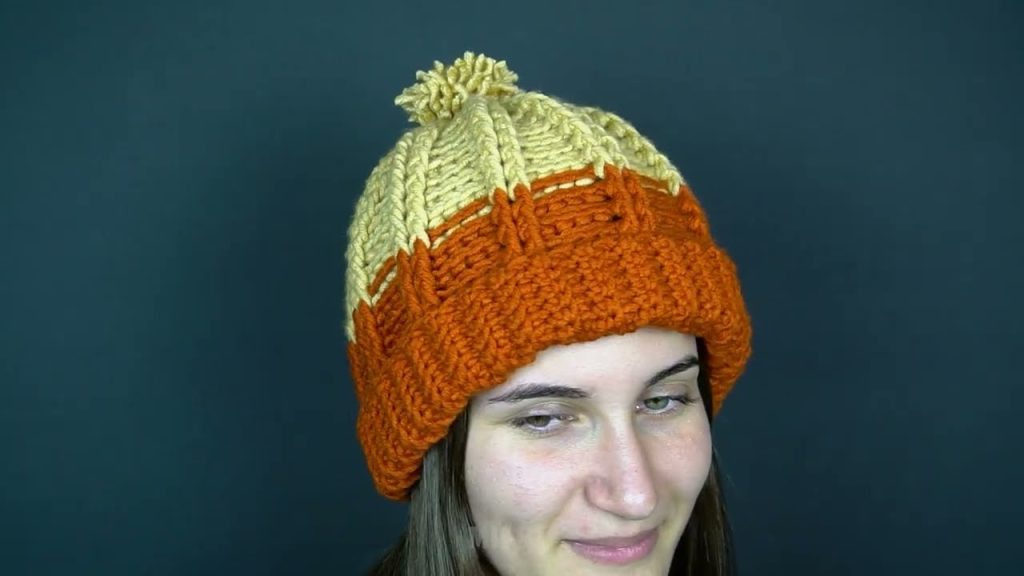
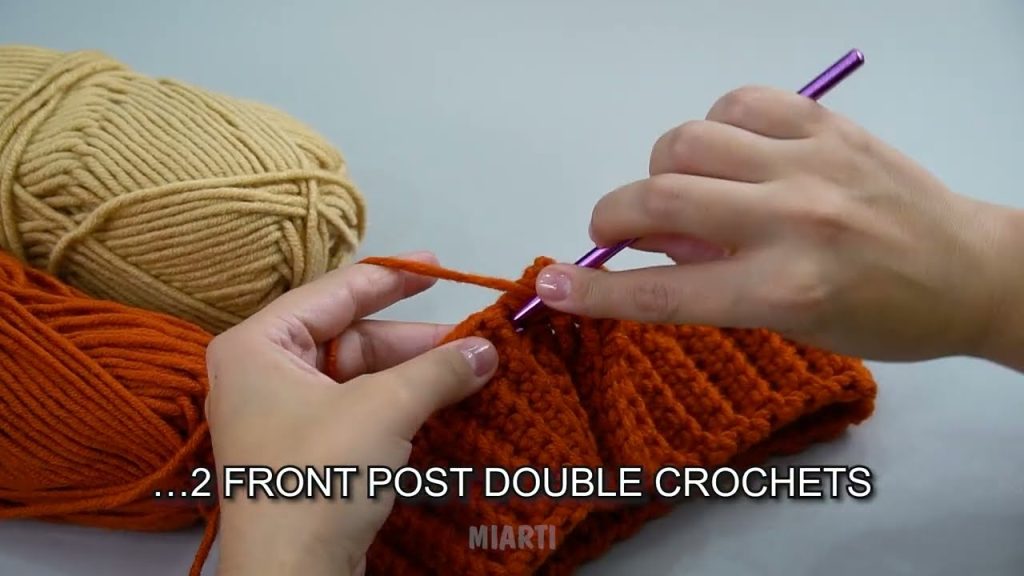
🧵 Step 4: Add the Brim
- Switch to single crochet for a neat edge.
- Crochet 2–4 rounds.
- For extra stretch, you can use front-loop-only stitches.
Optional:
- Ribbed brim (front post/back post stitches)
- Color change for a stylish look
✨ Step 5: Finishing Touches
- Slip stitch to finish.
- Cut yarn and fasten off.
- Weave in all loose ends.
Optional decorations:
- Pom-pom
- Crochet flower or patch
- Fold-up cuff
🌸 Beginner Tips
- Try the hat on as you go.
- Use a stitch marker to keep track of rounds.
- Keep tension relaxed and even.
- Adjust size by adding or reducing increase rounds.
🎉 Final Thoughts
This beautiful crochet hat is a perfect beginner project that works for everyone—kids, adults, and gift-giving. It’s easy, versatile, and a great way to build confidence in your crochet skills.
If you’d like, I can:
- Turn this into a short printable pattern
- Adjust it for babies or children
- Create a video tutorial script
Watch tutorial: