 by
by Sure! Here’s a detailed step-by-step guide on how to easily crochet a Granny Square Bucket Hat, even if you’re a beginner. This project is fun, colorful, and trendy—and a great way to use up yarn scraps too!
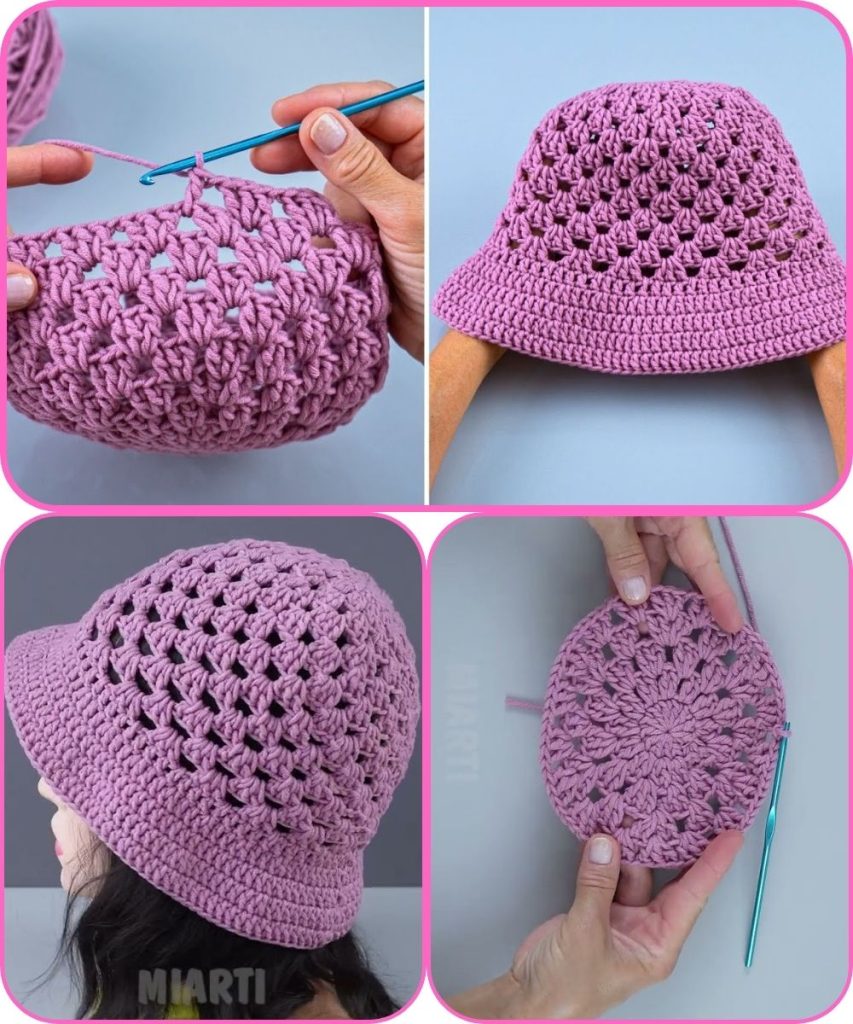
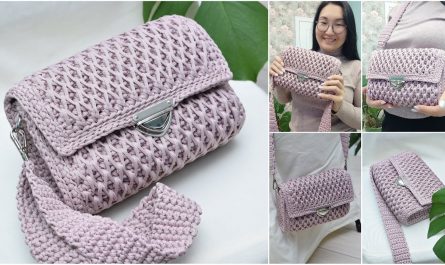
🧶 How to Crochet a Granny Square Bucket Hat (Easy Method)
✨ What You’ll Learn:
- How to make a basic granny square
- How to join granny squares
- How to shape a hat from squares
- How to crochet the brim
🧰 Materials Needed:
- Worsted weight yarn (medium #4) in various colors (cotton or acrylic)
- Crochet hook (Size H/5.0 mm recommended)
- Yarn needle
- Scissors
- Stitch markers (optional)
- Measuring tape
🧵 Skill Level: Easy (Beginner-Friendly)
You just need to know basic stitches:
- Chain (ch)
- Slip Stitch (sl st)
- Double Crochet (dc)
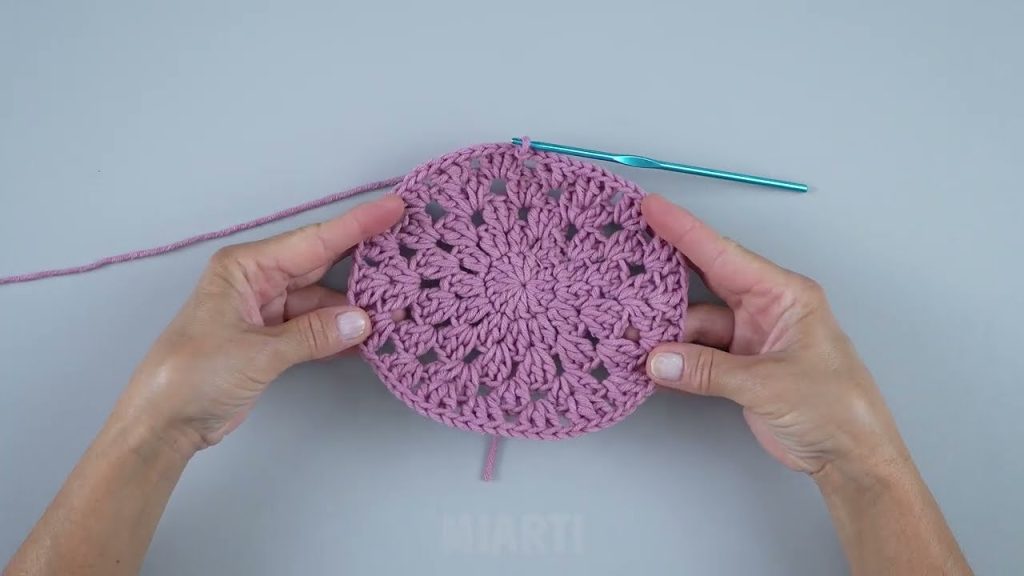
🧱 Step 1: Make Your Granny Squares
🔹 Basic Granny Square Pattern:
(Traditional 3-round square)
Round 1:
- Start with a magic ring or ch 4 and sl st to form a ring.
- Ch 3 (counts as 1 dc), 2 dc in the ring, ch 2,
- [3 dc in ring, ch 2] x 3 times
- Sl st to top of ch-3 to join. (You’ll have 4 dc clusters and 4 ch-2 spaces)
Round 2:
- Sl st to next ch-2 space.
- Ch 3, 2 dc in same space, ch 2, 3 dc in same space (first corner made)
- In next ch-2 space: 3 dc, ch 2, 3 dc
- Repeat around, sl st to join.
Round 3:
- Continue as above: in each corner space: 3 dc, ch 2, 3 dc
- In each side space: 3 dc
- Sl st to join and fasten off.
➡️ Make 5–7 Granny Squares, depending on your head size and desired hat fit.
🧩 Step 2: Join the Squares
You will form a crown (top of the hat) using the squares.
🔹 Simple Layout:
- 5 squares: Form a ring (like a cube without a top or bottom)
- Seam the squares side by side using whip stitch or single crochet join.
🔹 Optional (for bigger hats):
- Add a 6th square on top for more structure.
Joining Tip: Place squares right sides together and whip stitch through the outer loops for a clean join.
👒 Step 3: Crochet the Top (If Not Using Square on Top)
If your crown is open (no top square), you can close the top with rounds:
- Attach yarn at any corner of the top edge.
- Work dc stitches evenly around, decreasing slightly to shape.
- Continue working in the round, decreasing every few rounds until the top is closed.
🧢 Step 4: Add the Sides of the Hat (Body)
Once the crown (granny square tube) is done:
- Attach yarn to any stitch at the bottom edge of the squares.
- Work 1 dc in each stitch around (join with sl st).
- Continue working in rounds (no increases) for 3–5 inches depending on how deep you want the hat.
- Try it on occasionally to check the fit.

🌼 Step 5: Crochet the Brim
- After body height is done, start increasing to create the brim:
- Round 1: 2 dc in next st, 1 dc in next 2 sts – repeat around
- Round 2: 2 dc in next st, 1 dc in next 3 sts – repeat
- Continue increasing as needed for 3–5 rounds to get the desired flare.
- Optionally, switch to single crochet (sc) for the final 1–2 rounds to stiffen the brim.
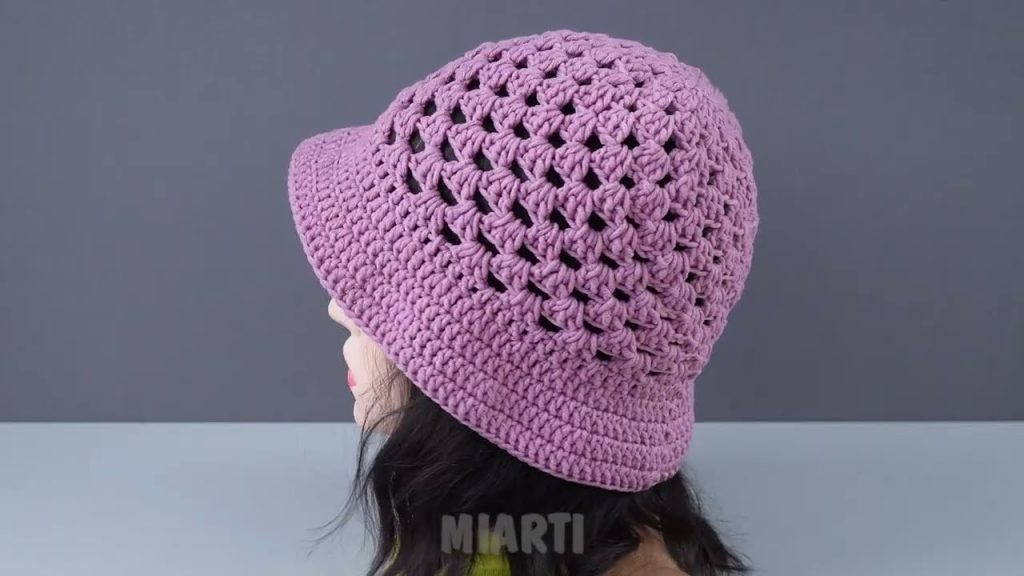
🧶 Step 6: Finish Off
- Weave in all ends with a yarn needle
- Block your hat if needed (light steam with iron over a cloth to shape)
- Try it on and admire your work!
🖼️ Optional: Add Flair!
- Add a drawstring, ties, or buttons
- Try a color-coordinated border
- Use multicolor yarn for a boho vibe
📏 Sizing Tip:
Measure your head circumference and adjust the number or size of squares accordingly. For adults, aim for about 21–23 inches in diameter around the crown.
📹 Want a Visual Guide?
If you’d like, I can recommend YouTube tutorials that match this step-by-step method.
Watch tutorial: